Manage Your Client List in RightCapital

- Create new clients and open existing client plans via the Client List.
- View a summary of the Client's info on the Overview tab.
- View and edit household information in the Personal Info tab.
- Invite clients and manage client access via the Client Access tab.
- Customize and re-order the client portal in the Planning Access tab.
- Tailor the initial data entry process within the Onboarding tab.
For advisors with Team Sharing enabled, you can also switch between client lists, and mark specific plans private.
Client List
Your client list can be found on the left side of the Advisor Portal > Clients tab. This area provides insight into your entire book of business within RightCapital. The client list lets you search for individual client plans and view specific groups from the dropdown menu. Households will be listed alphabetically based on the client's last name:

Clients will display based on the name of the first client listed in the plan, but you can still search by co-client if you like.
Add & Open Client Plans
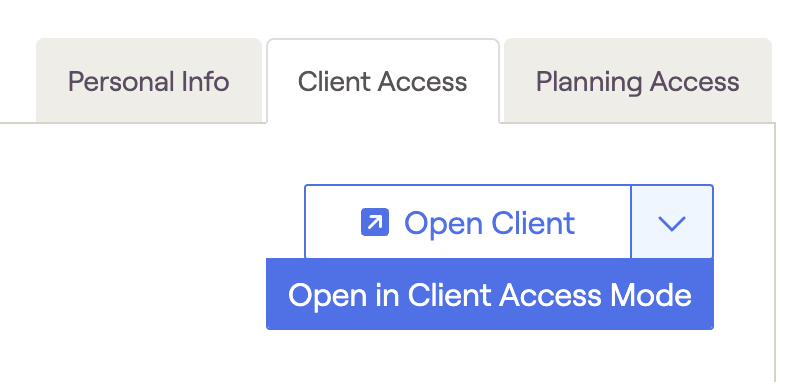
New client plans can be created by clicking the '+ Add a New Client' button at the top of the client list. Client plans that have already been created can be opened by clicking on a particular client in the client list, and then clicking the 'Open Client' button in the upper right of the page (or the arrow icon next to the client's name):

Delete a Client Plan
Within the Advisor Portal > Overview > click on the three-dot icon to the right of the client name to delete.

If you ever delete a client plan by mistake and need it recovered, please reach out to RightCapital Support.
Hide Your Client List

Overview
Team Sharing

Group

Personal Info

Contact Information
If you have imported the household via a third-party CRM integration, like Redtail or Wealthbox, some of the contact information may already be present within the Personal Info tab.
Client Access
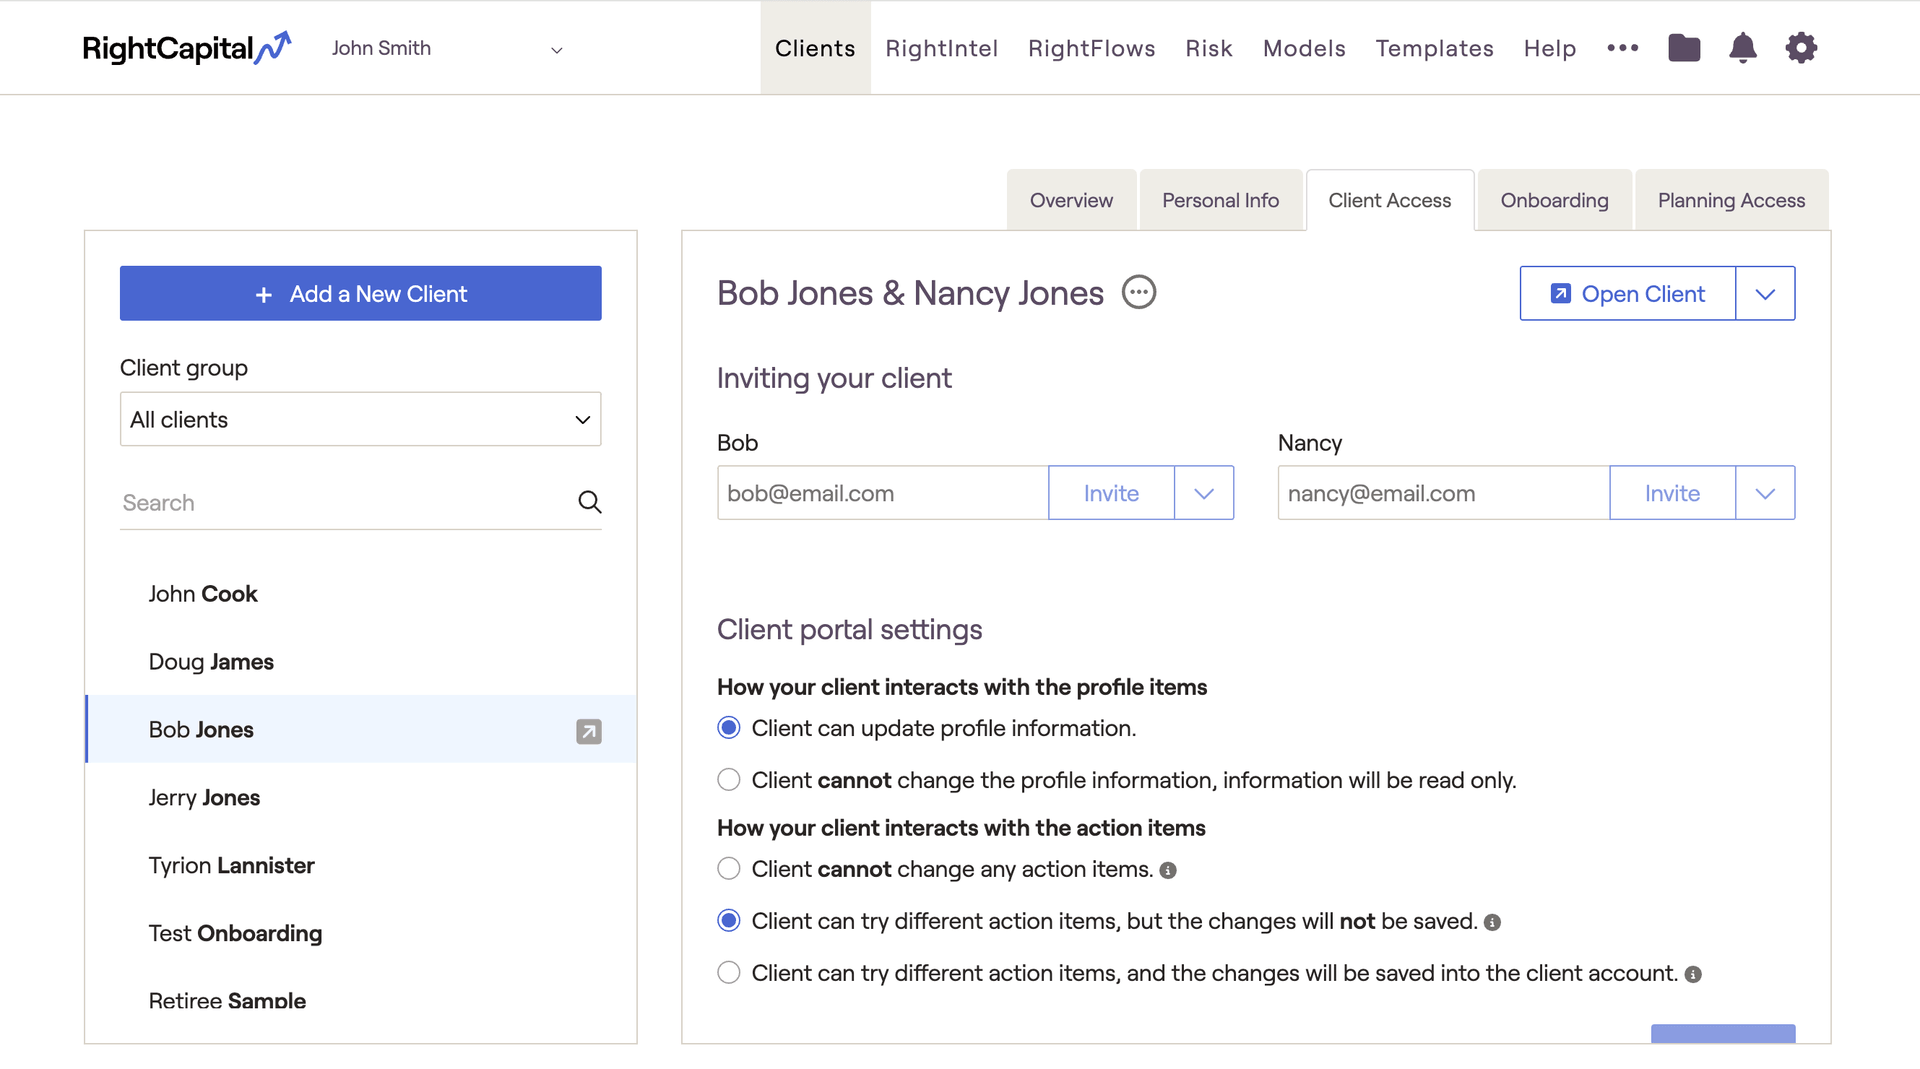
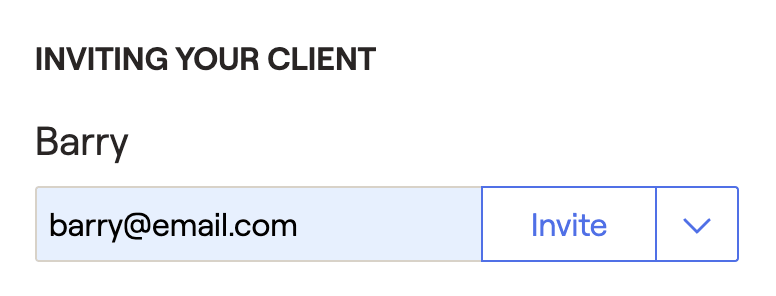
Invite Clients & Manage Access
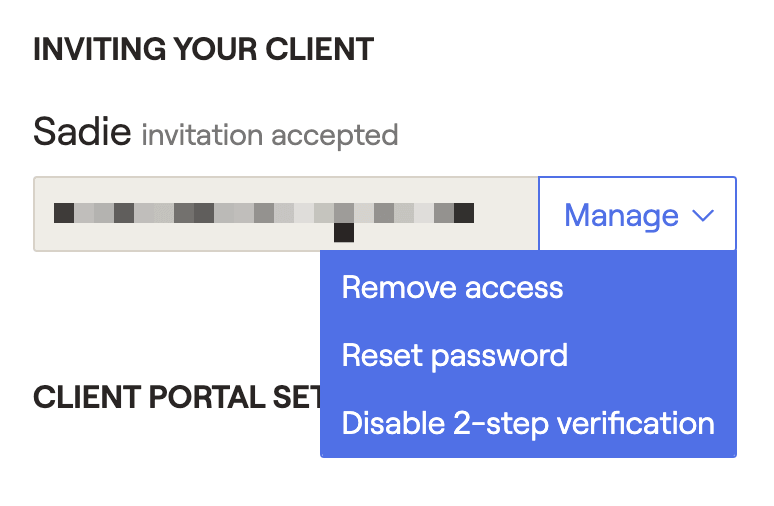
After the invitation has been accepted by the client, you can manage their access by clicking the 'Manage' button next to their email:
Client Portal Settings
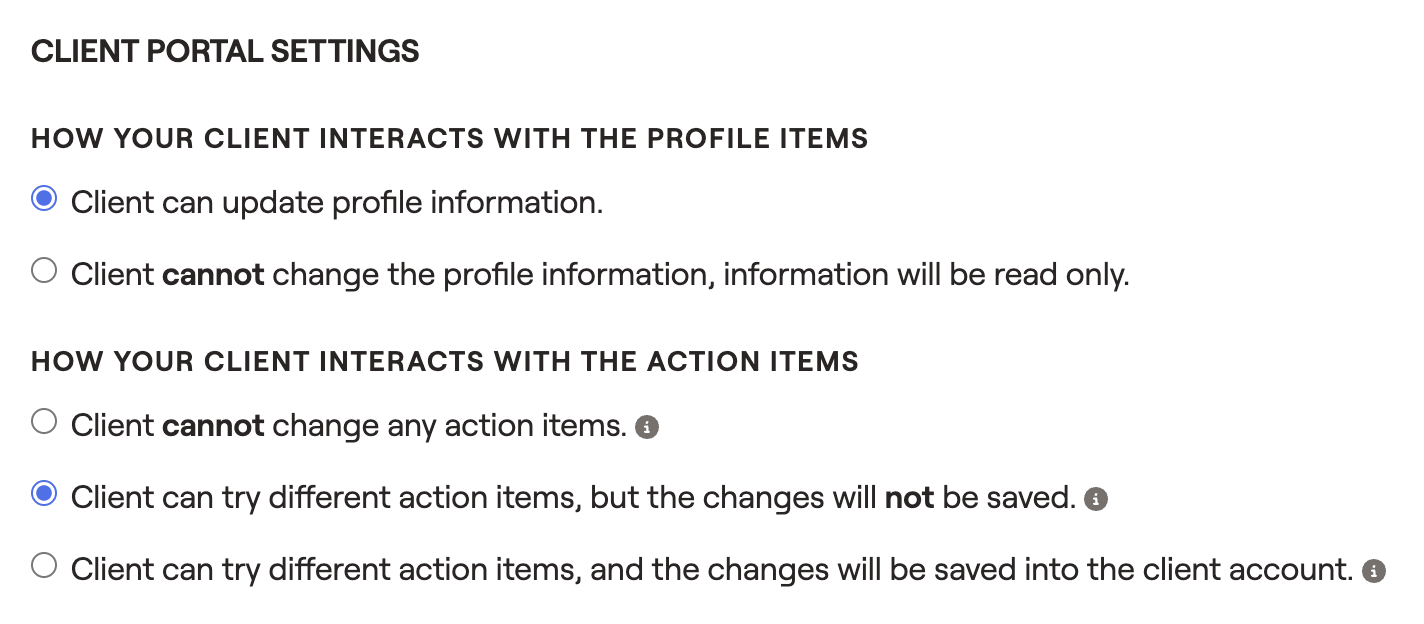
- "Client can update profile information" will allow the client to update their Net Worth, Goals, Income, Savings, Expenses, and Family Profile.
- "Client cannot change the profile information; information will be read only" will prevent clients from entering any data themselves.
For advisors with Account Aggregation enabled, your clients will always be able to Link Accounts in the Profile > Net Worth section, regardless of the option you select for this setting.
- "Client cannot change any action items" will prevent clients from making changes to the Action Items.
- "Client can try different action items, but the changes will not be saved" will allow clients to use the Action Items, but will prevent them from being able to Save any changes.
- "Client can try different action items, and the changes will be saved into the client account" will allow clients to use the Action Items, as well as Save their changes. When using this option, the Action Items on the client side will differ from those on the advisor side. Changes made and saved on the client side will never overwrite changes made and saved on the advisor side.
Clients will not have the ability to Add New Proposals to the Retirement Analysis, regardless of the option you select for this setting. They will also not have access to the Action Items > Edit or Reset buttons.
Planning Access
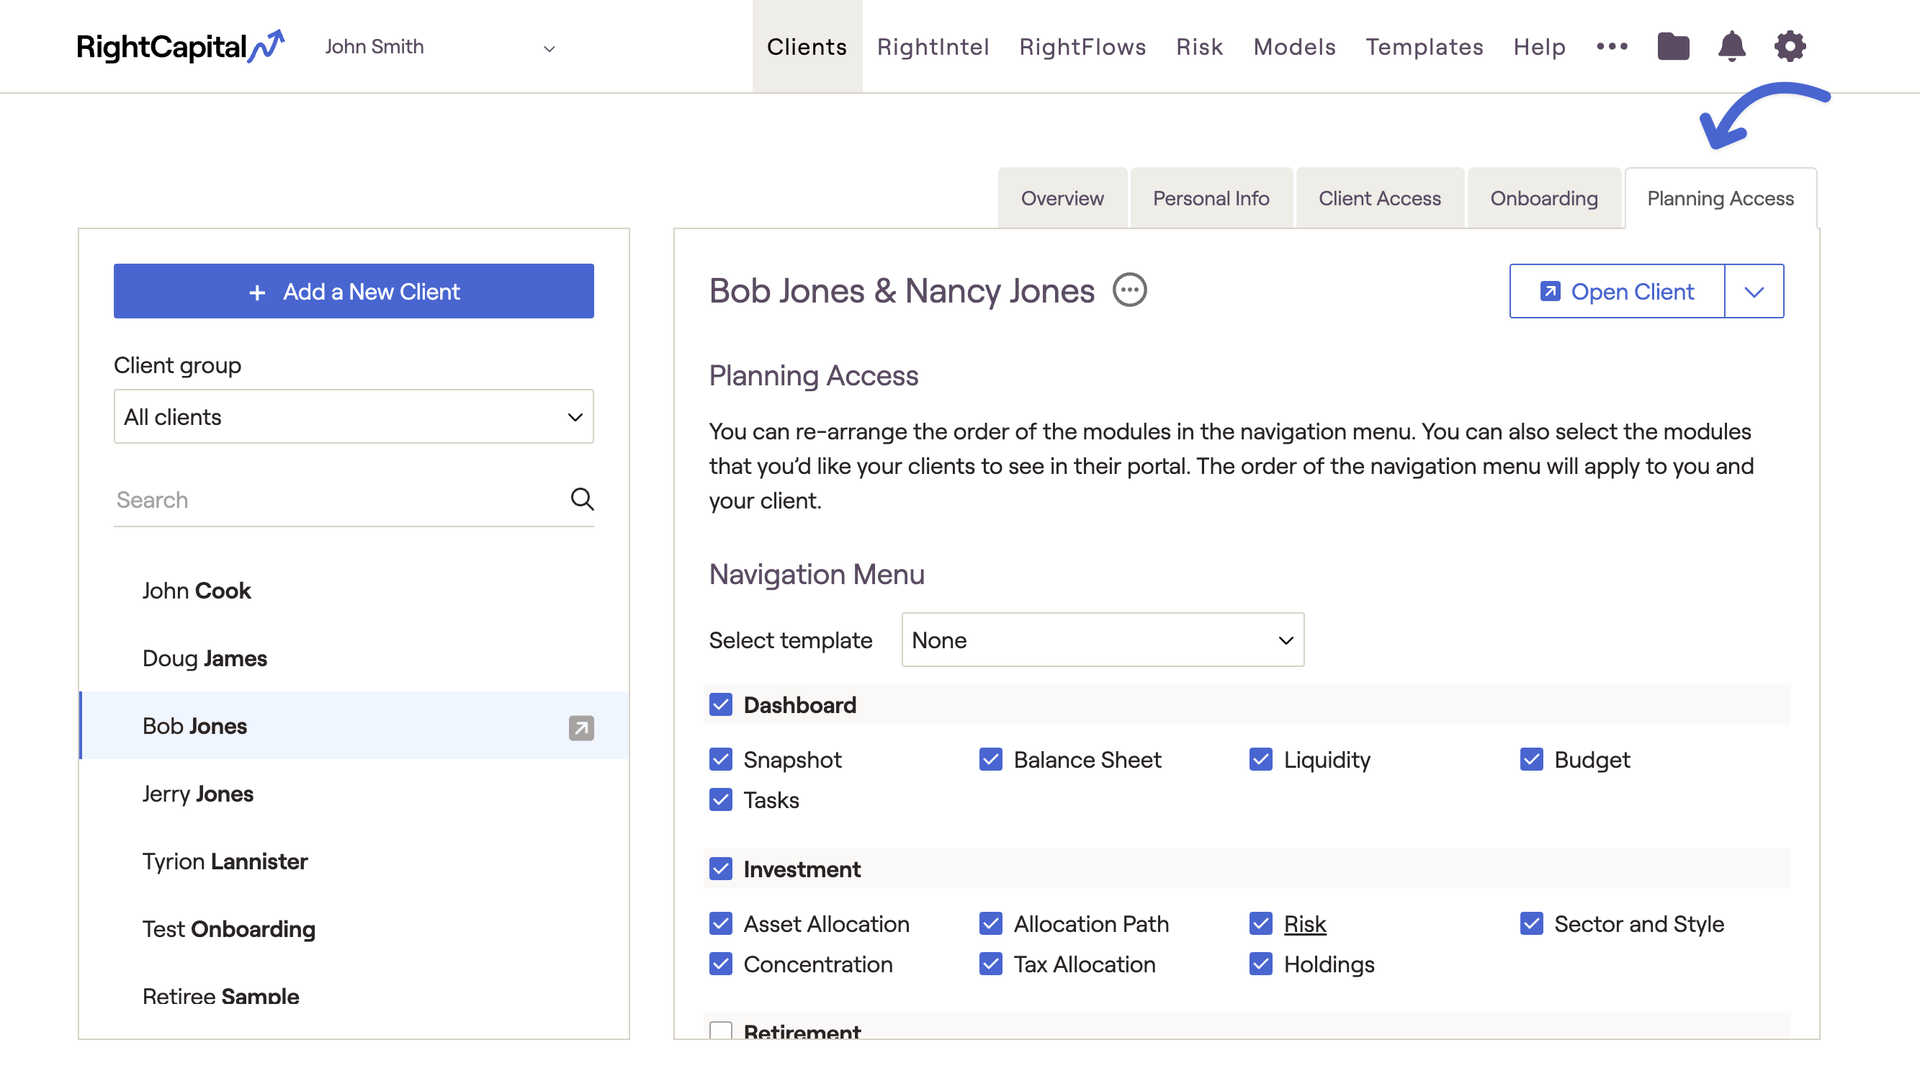
Customize Module Access
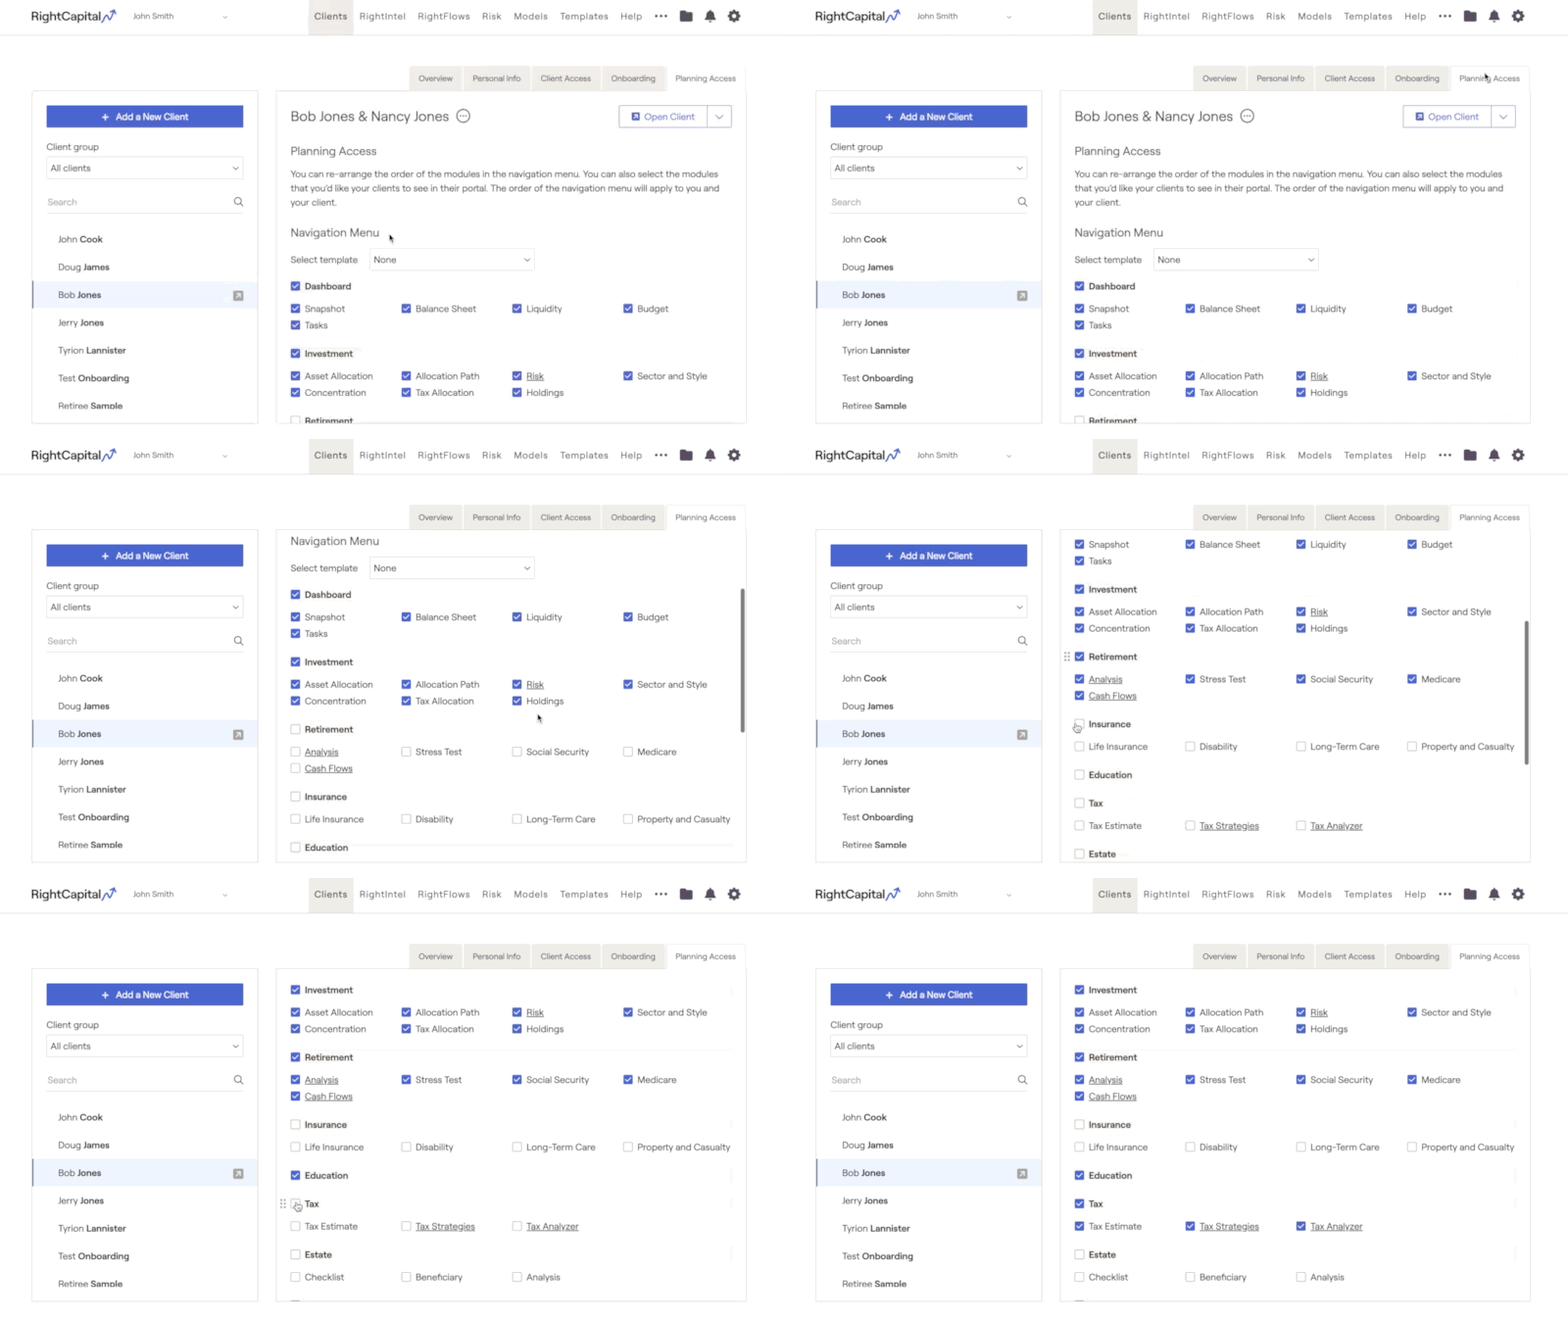
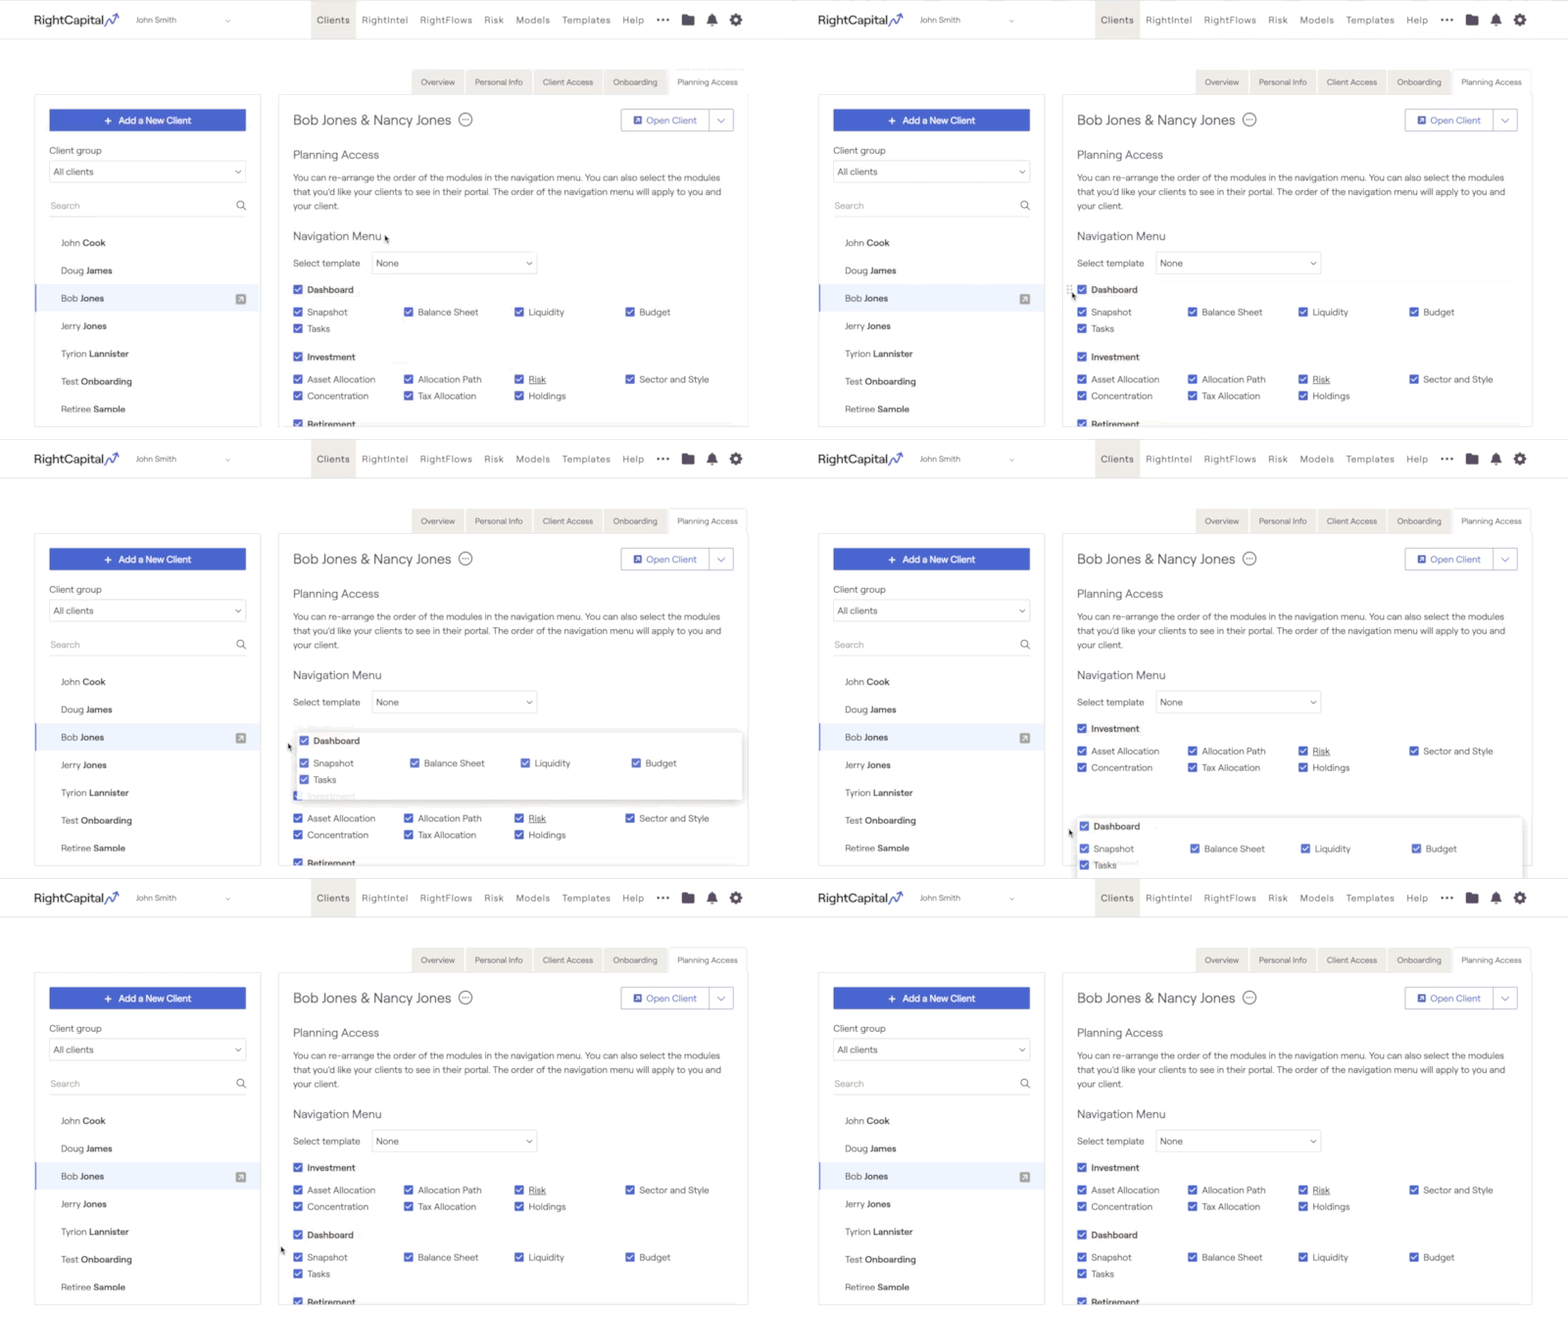
Rearrange the Client Plan
You can also drag and drop specific modules or tabs to rearrange the order in which they will appear within the client plan. This can be done regardless of whether the client has been invited, and the changes will impact the view of the plan from both the advisor side and the client side:
You can save a specific planning access layout as a template, for easy access in the future. Click the link for more on Planning Access Templates.
Onboarding
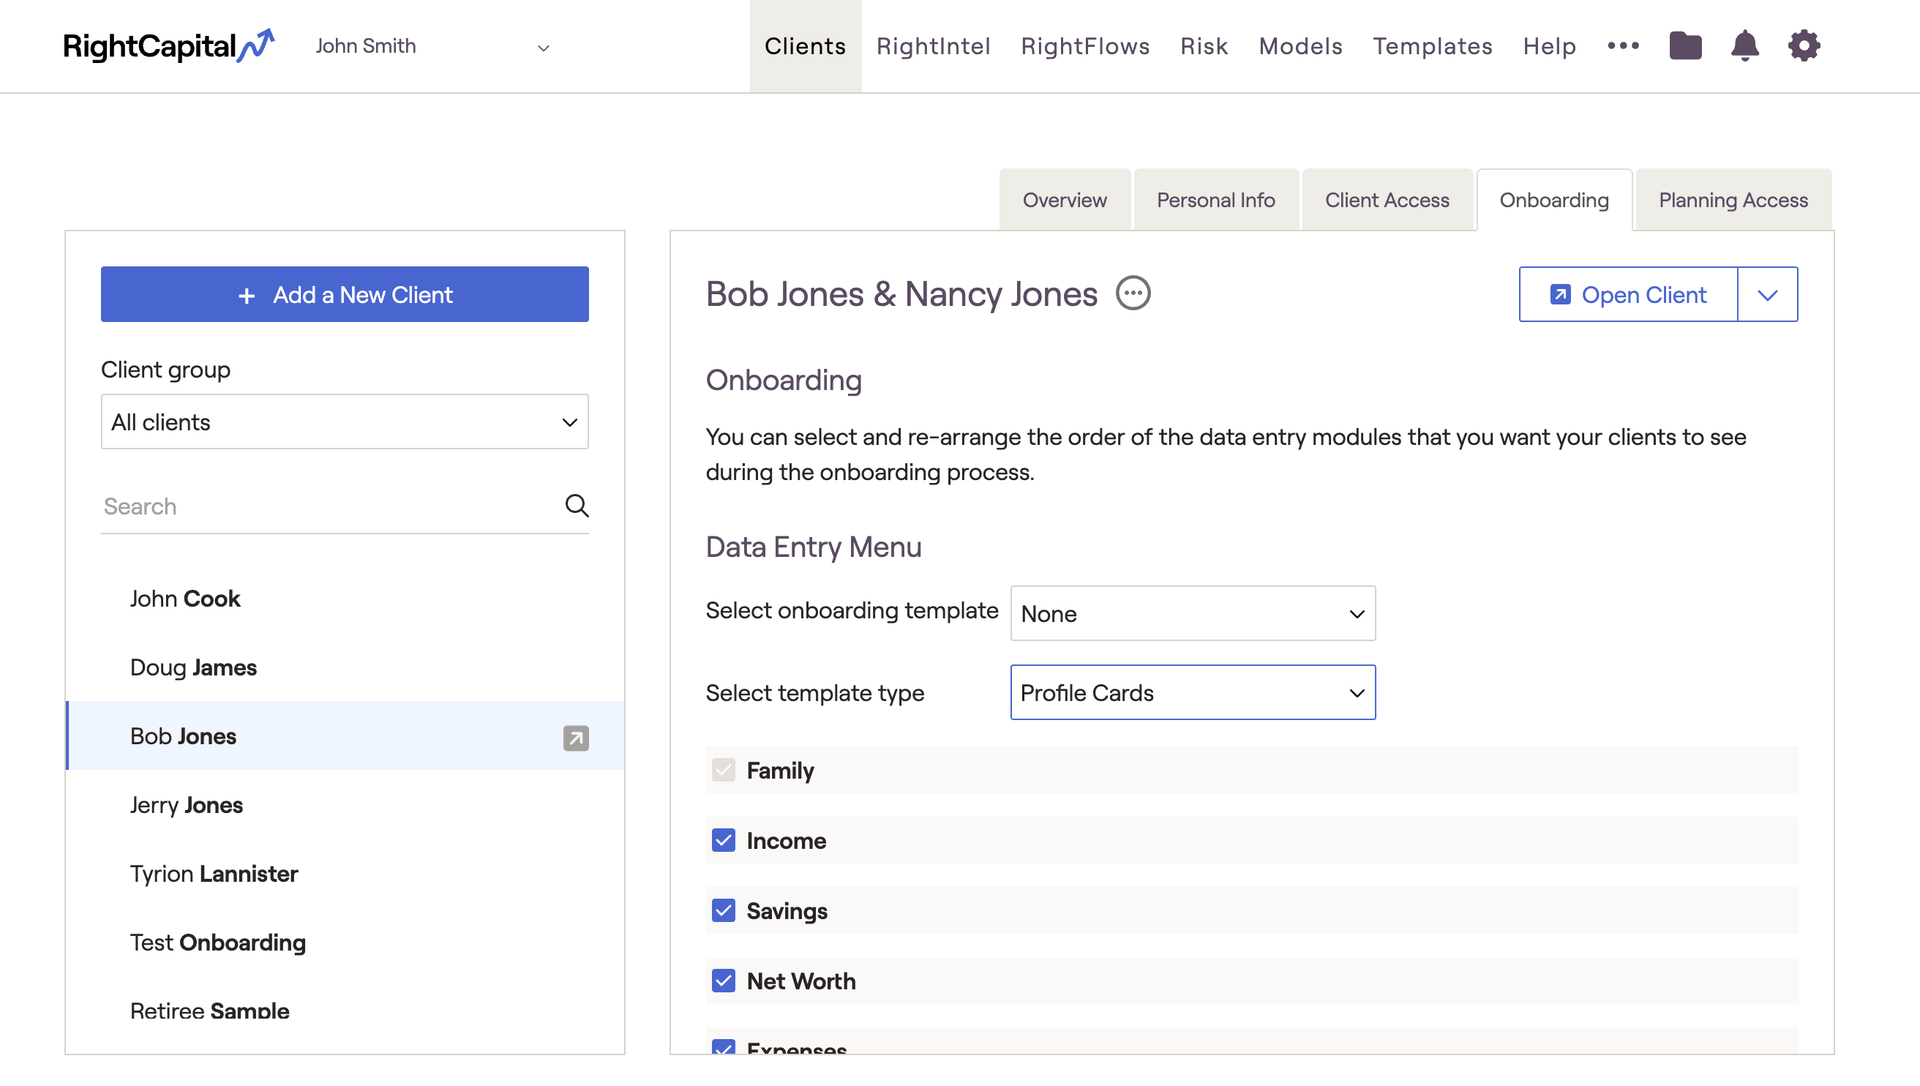
Remove or Re-Order Steps

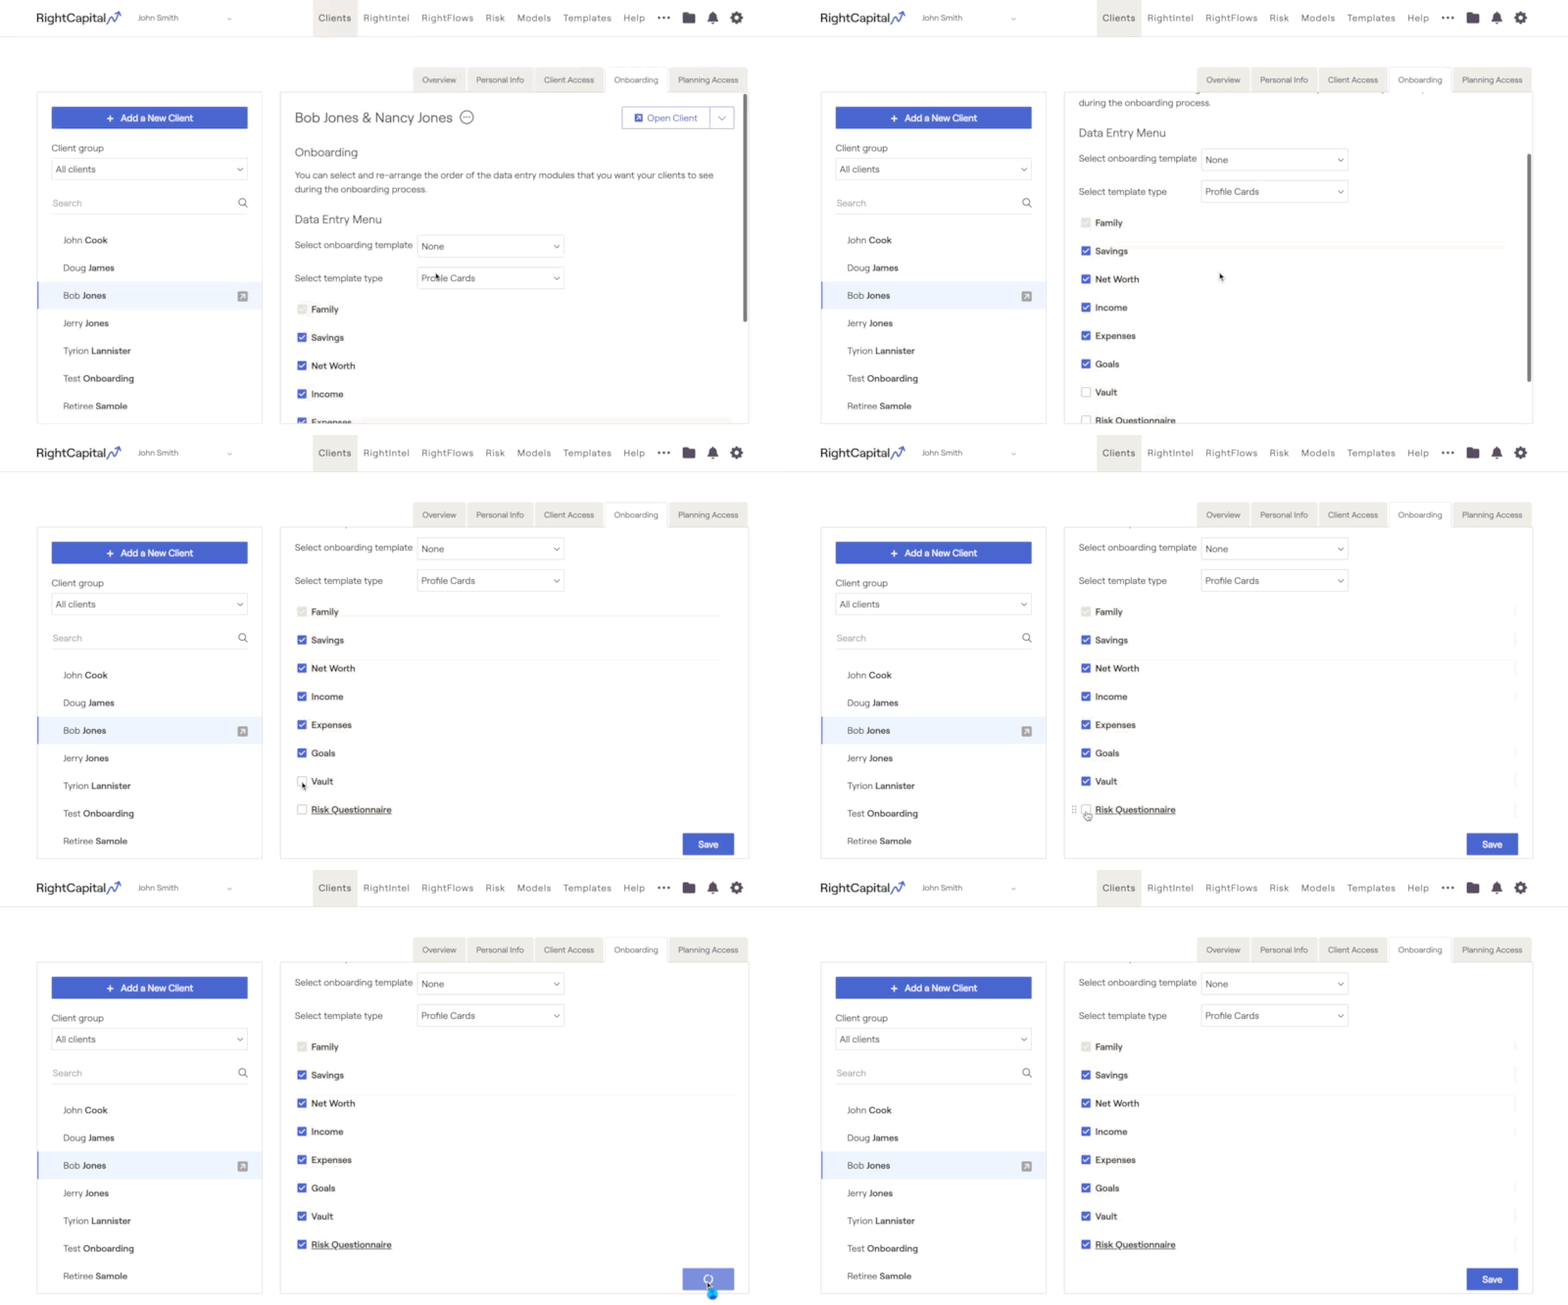
If you'd like to remove any of these steps, deselect the box next to those steps. If you'd like to re-arrange the order in which they appear, you can drag and drop each step into your preferred order. The only step that can't be removed or re-ordered is the Family Profile.
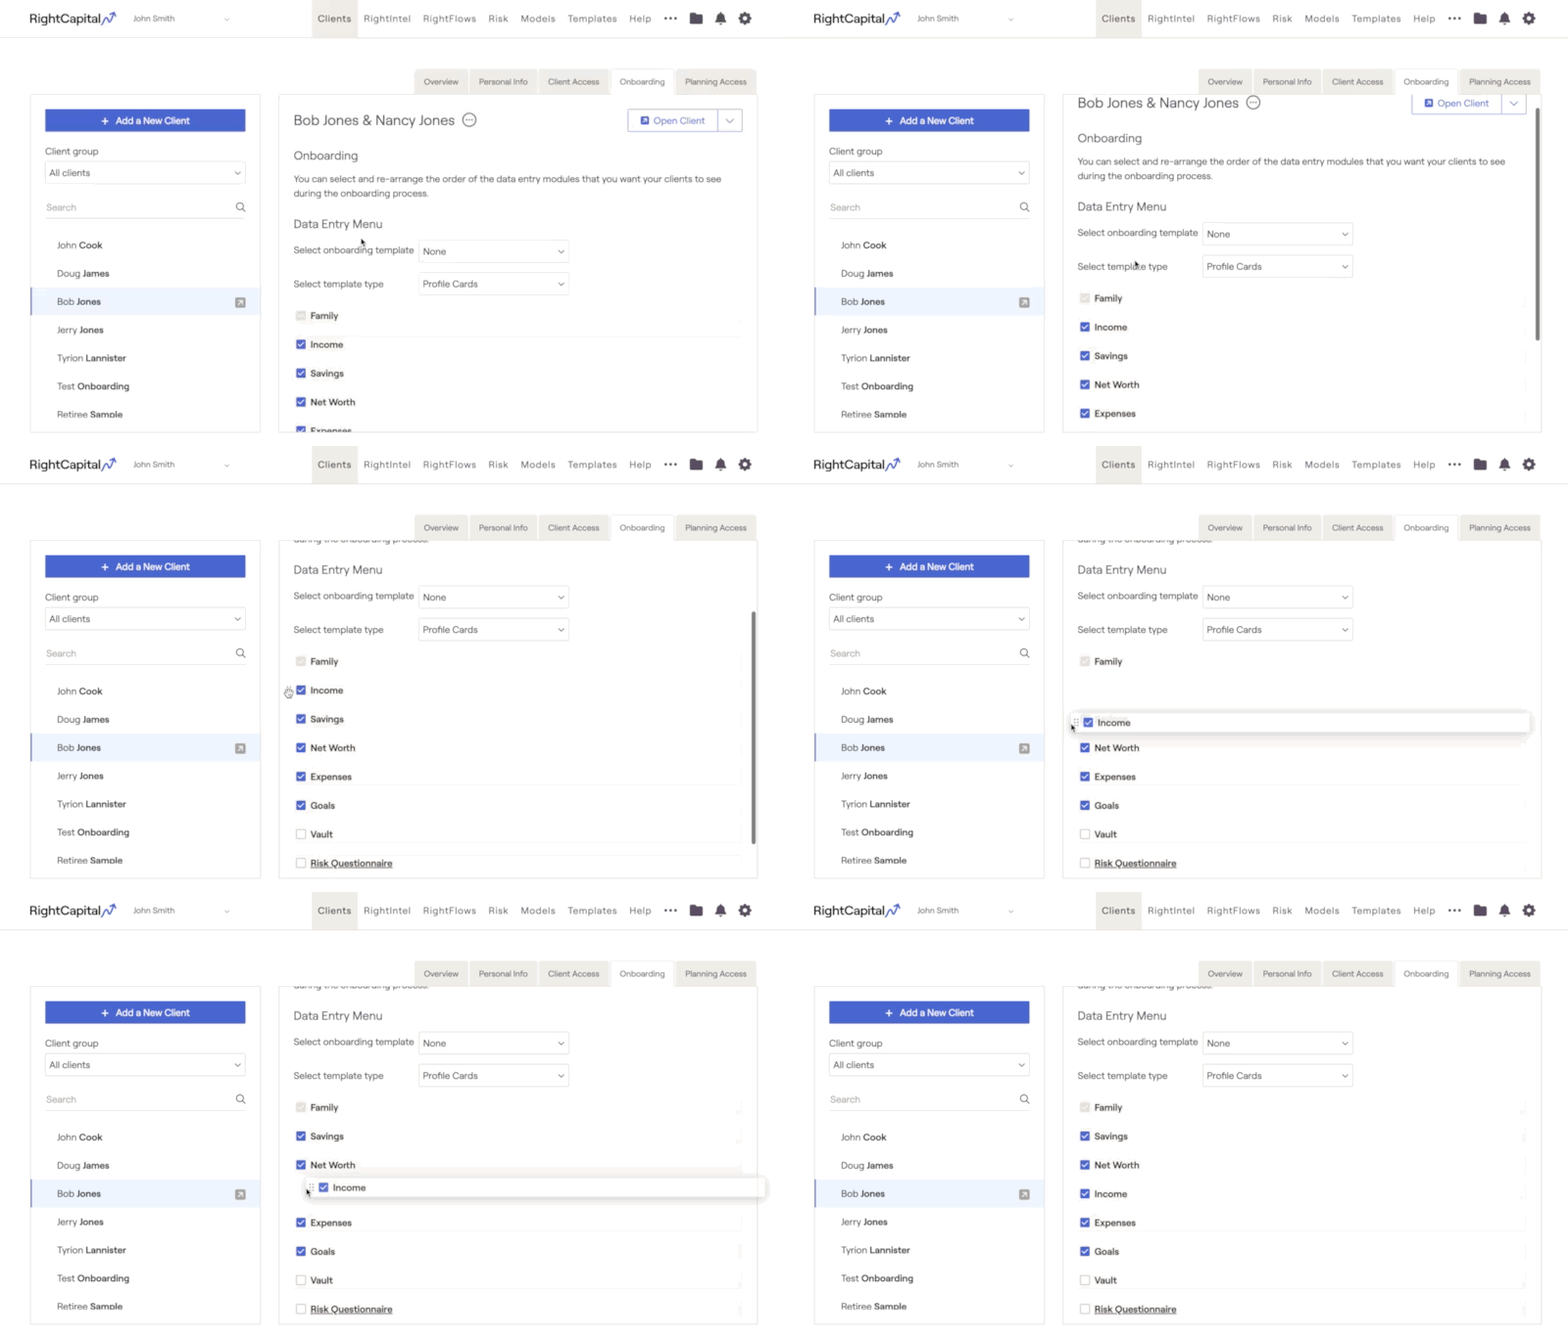
Upon next opening the client plan, the initial data entry template will update to reflect your changes. Clients who have been invited to have access to their plan and are being onboarded virtually will also see these changes:
Add New Steps
If you would like for a client to upload documents to their Vault or complete a Risk Questionnaire as a part of their onboarding process, you can also choose to add these steps to the initial data entry. This can be done by checking the boxes for each item:
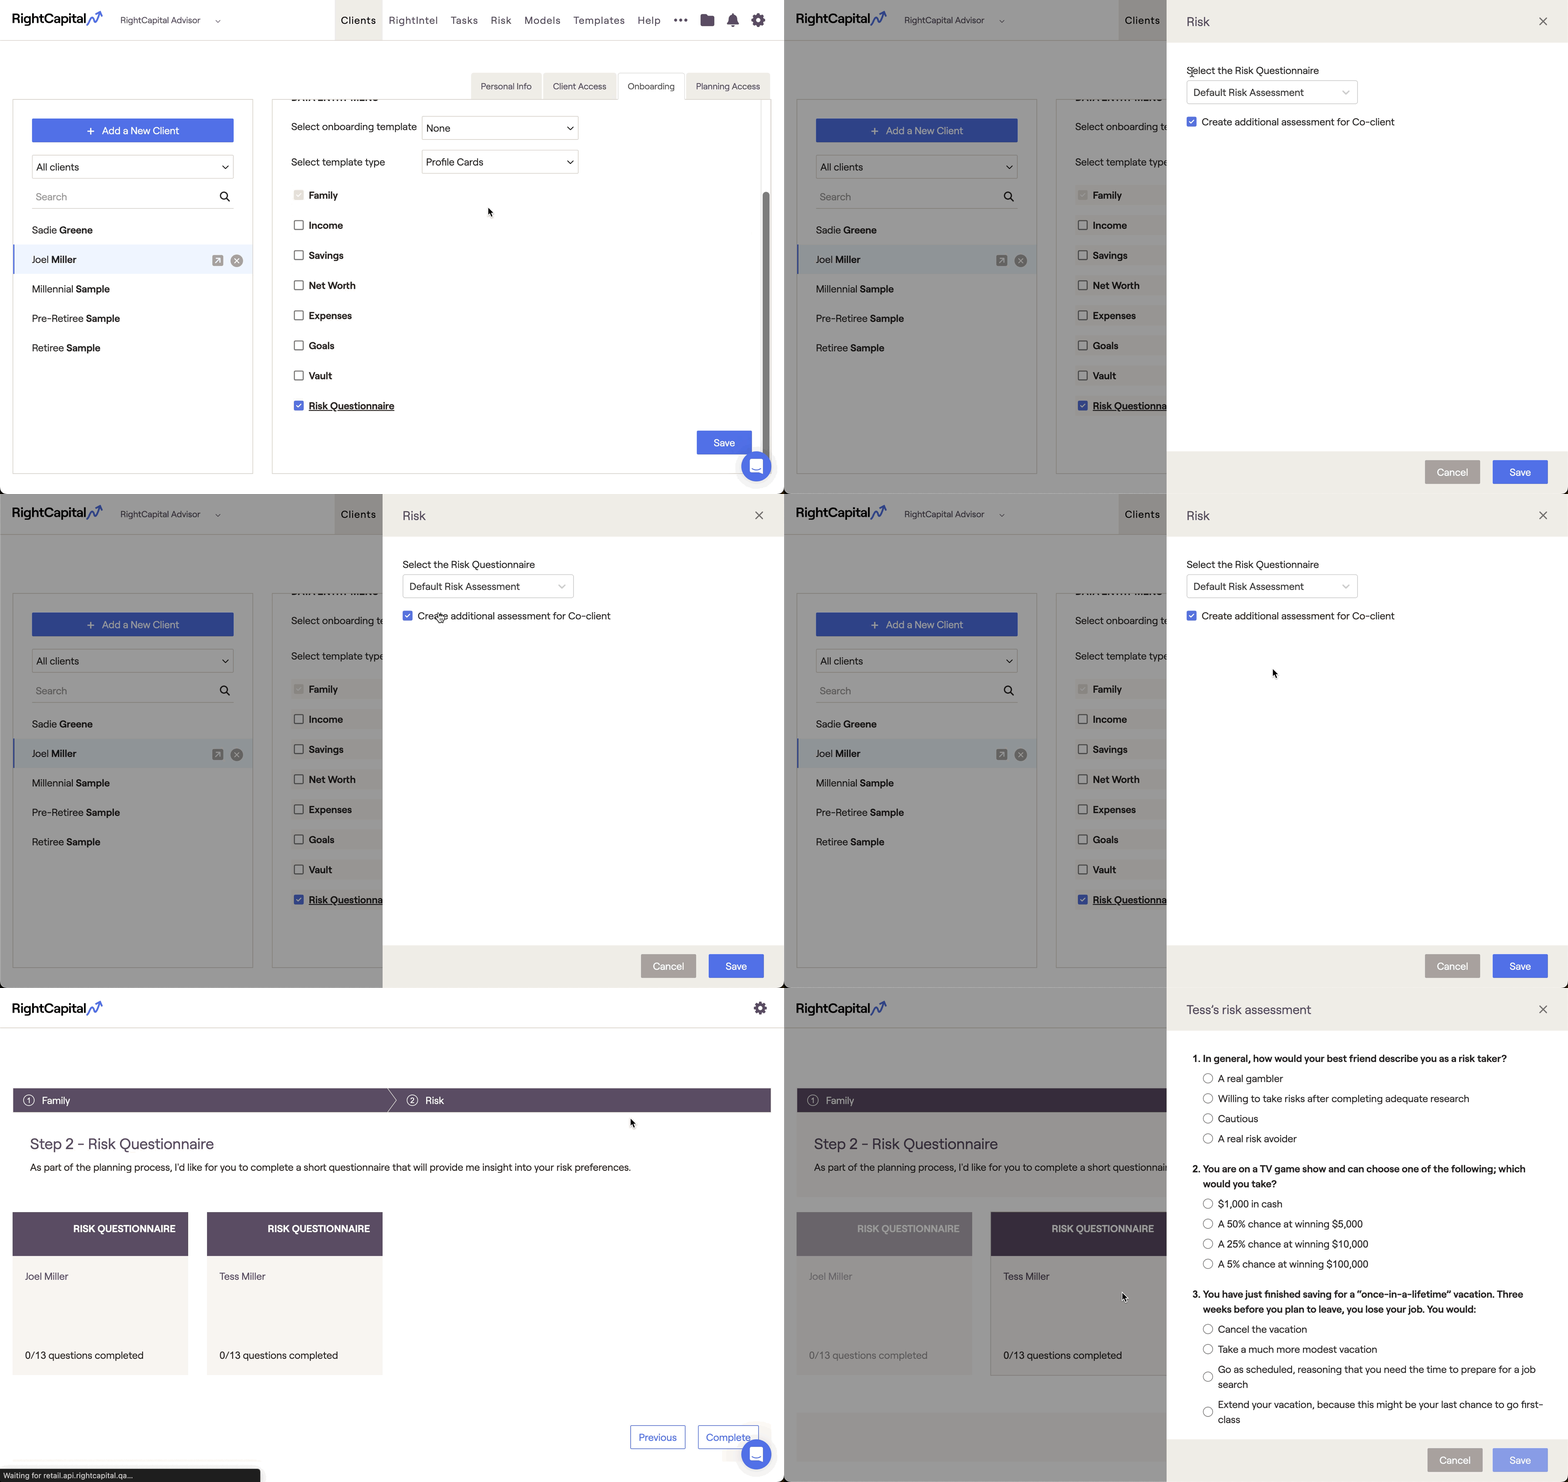
For Risk Questionnaires, you can click into the underlined header within the Onboarding tab to specify:
Which of your pre-built questionnaires you'd like to assign to the client
Whether you would like the co-client to also complete that assessment
For a step-by-step walkthrough on creating risk questionnaires in RightCapital, click here.
Onboarding with the Blueprint

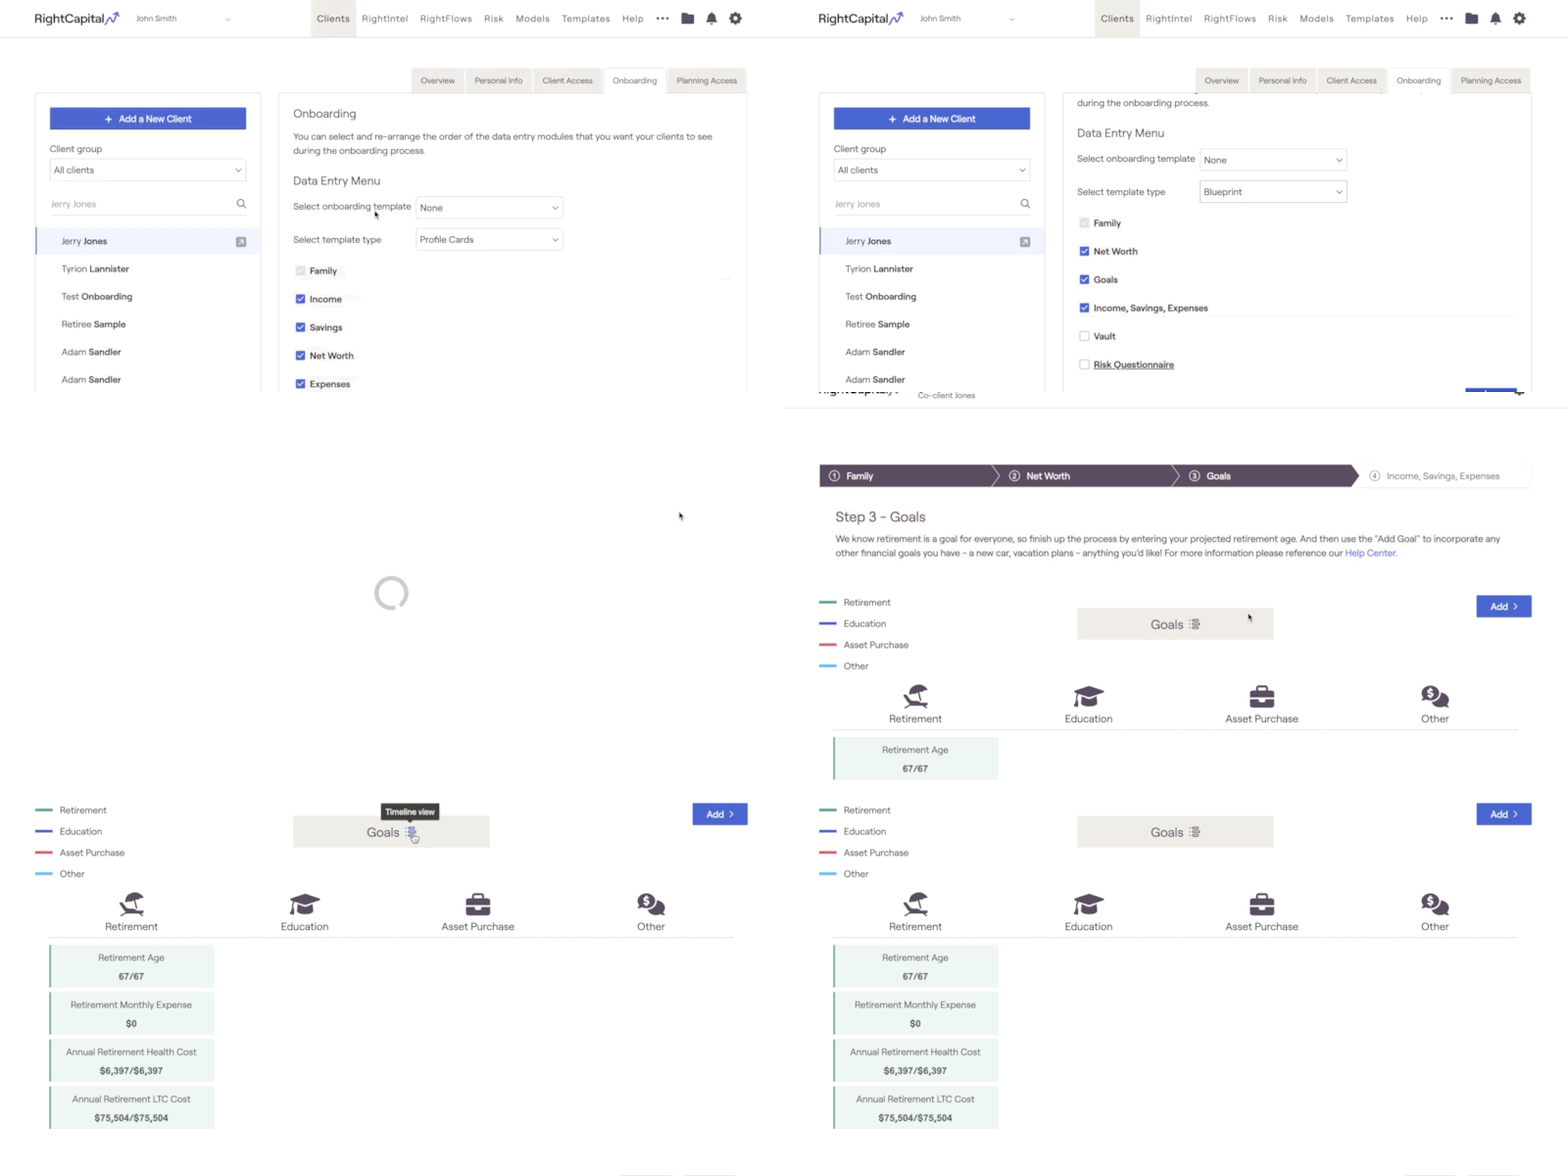
With this option selected, the initial data entry template will be adjusted to reflect the visuals and design from the Blueprint module. The functionality to Add New Items and Modify Existing Items mirrors the functionality within the Blueprint as well, with the added ability to Link Accounts within the Net Worth tab:

When using the Blueprint as your onboarding template type, you can still opt to include the Vault and Risk Questionnaires in the initial data entry process. See the Add New Steps section above for an overview.
You can save a specific onboarding layout as a template, for easy access in the future. Click the link for more on Onboarding Templates.