Consolidated Tasks List

RightCapital's advisor-level Tasks module, also referred to as the consolidated tasks list, allows you to quickly and easily assign and manage tasks across your entire book of business. To access the advisor-level Tasks module, navigate to the Advisor Portal > Tasks tab:

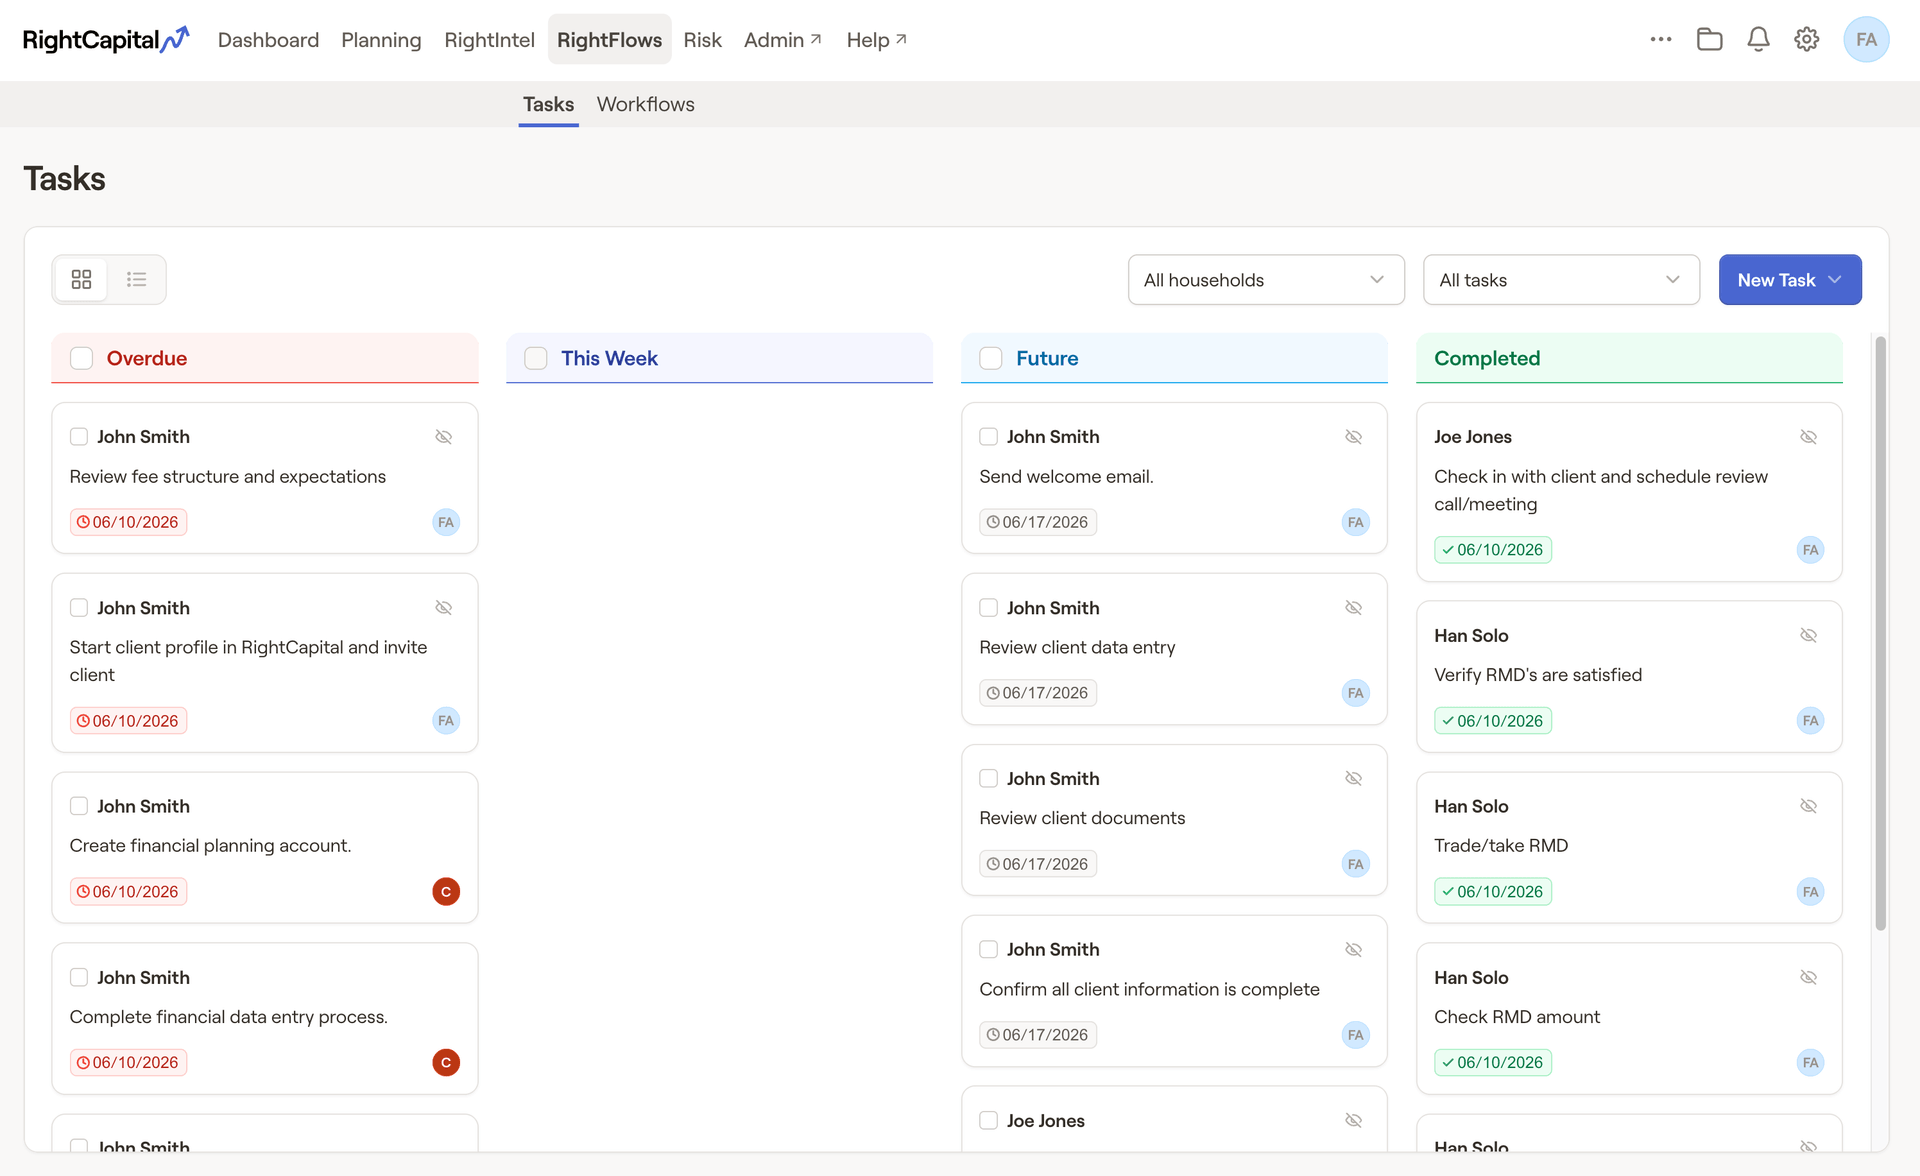
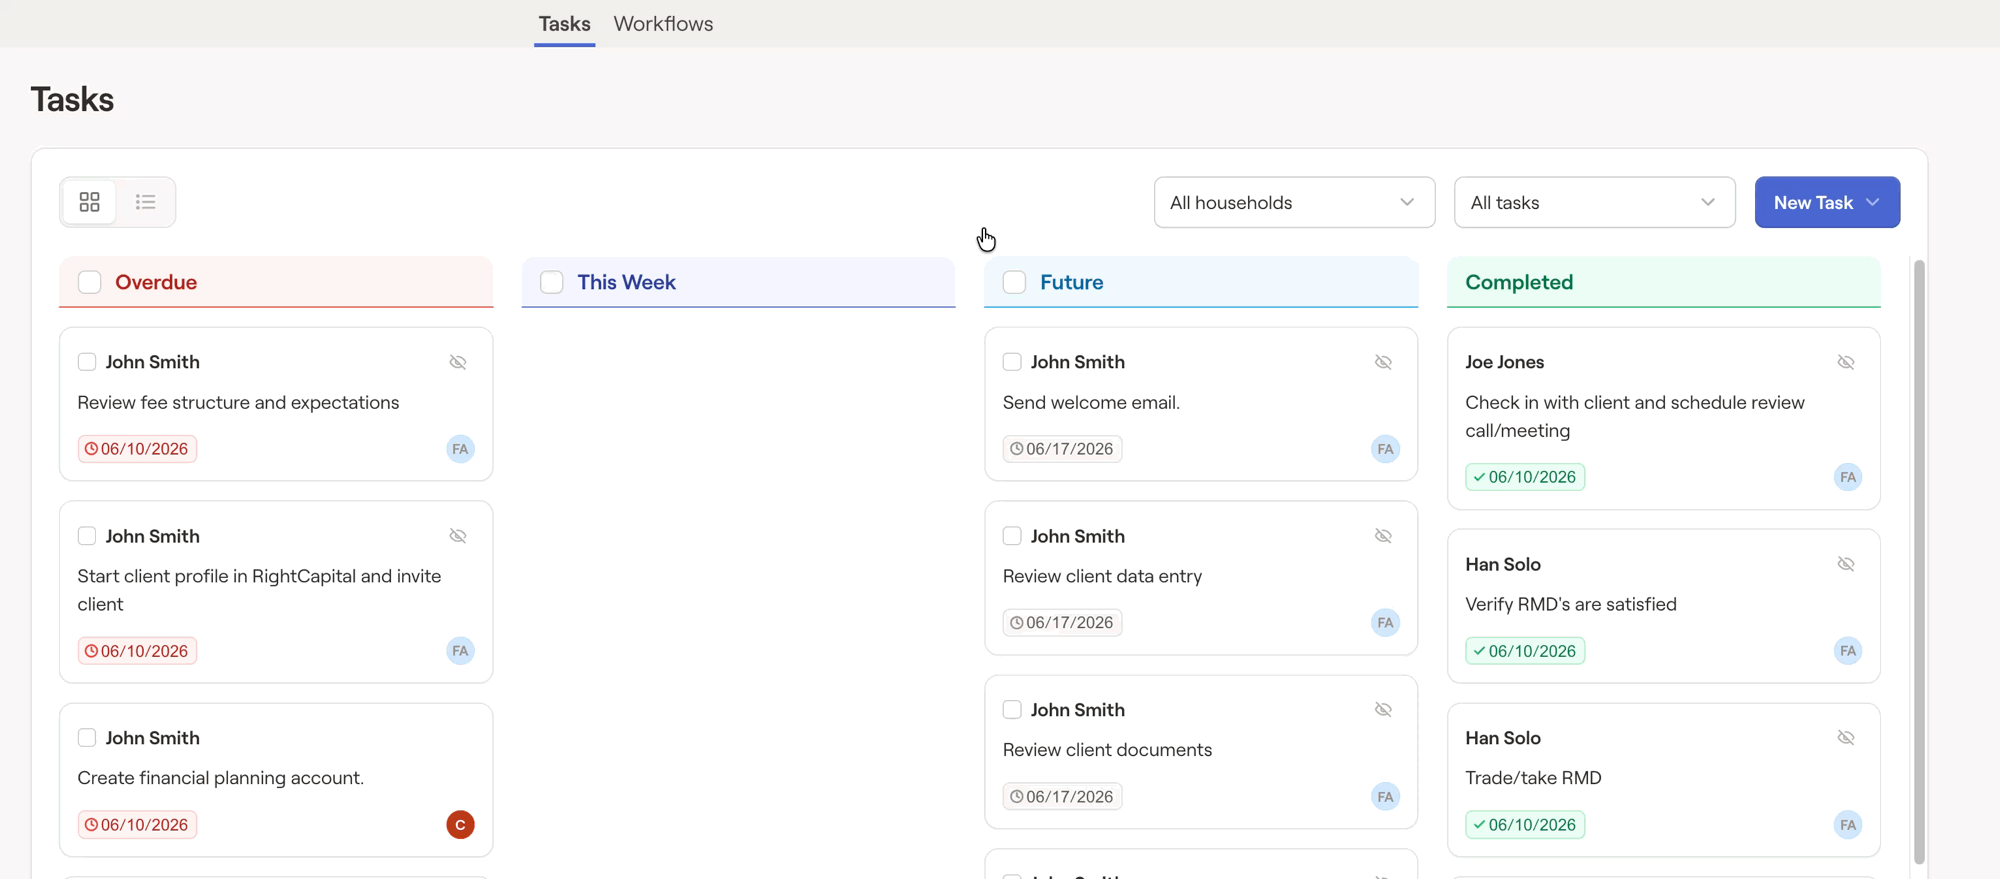
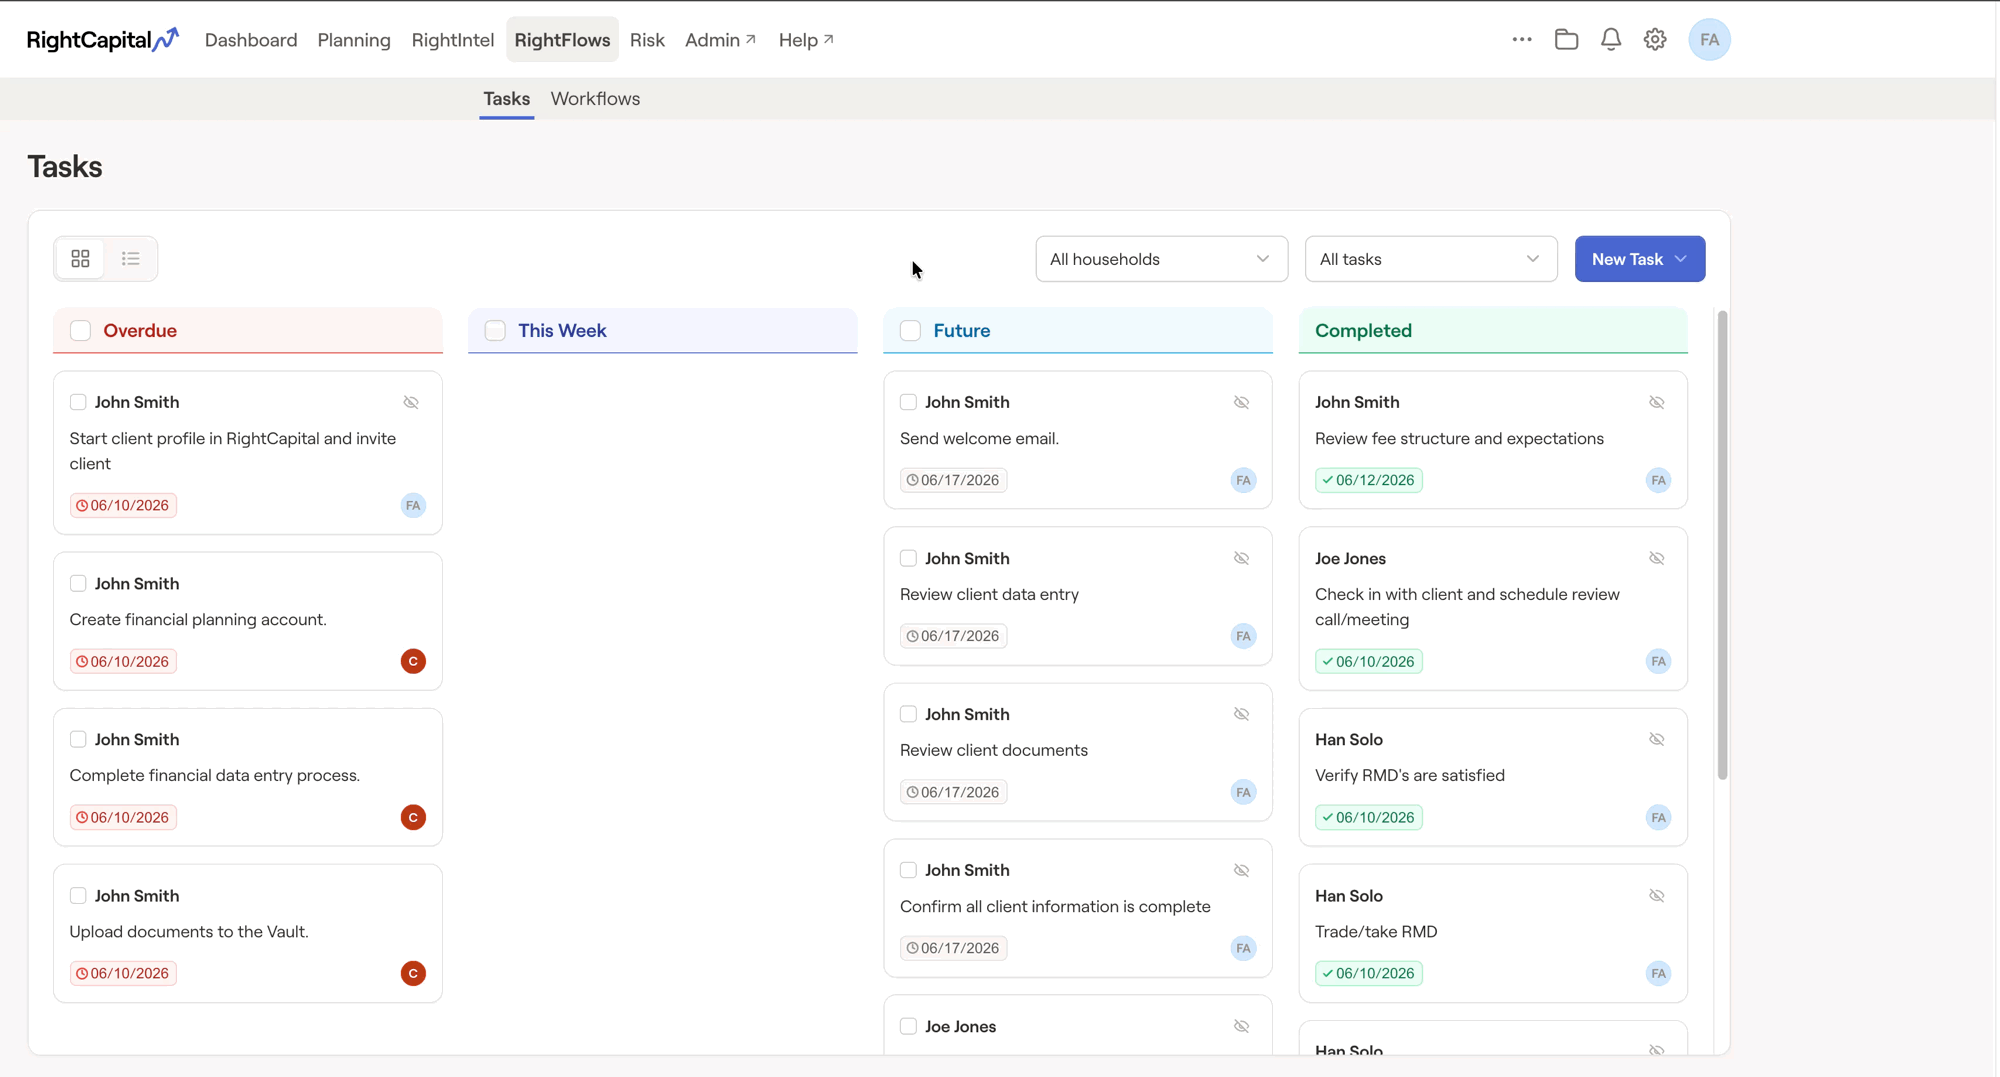
If you have RightFlows enabled for your account, the consolidated task list in the Advisor Portal will be located within the RightFlows module:

Looking for the Dashboard > Tasks tab?

This article provides an overview of the consolidated tasks list in the Advisor Portal. For an overview of the client-specific Tasks tab, found within the Dashboard module of each client plan, click here.

Manage Tasks Across All Clients

Unlike the Dashboard > Tasks tab within each client plan, the consolidated tasks list will display all tasks across all of your clients in RightCapital. This makes it quick and easy to identify clients with overdue and upcoming tasks, without having to click into each individual plan. Effectively leveraging this module can help you keep clients engaged in the planning process, and ensure that they are staying on track toward achieving their financial goals.

The functionality to manage tasks within this area is identical to that of the client-specific Tasks tab:

  • Mark tasks complete as you and your clients complete them

  • Delete tasks that are redundant or no longer needed

  • Edit existing tasks if you need to make any changes

Mark Tasks Complete

To mark a task complete, check the box to the left of the task, and then click the Complete button that appears at the top of the page. You can complete multiple tasks at a time by checking multiple boxes. Once a task is marked complete it cannot be undone, so make sure you are completing the correct tasks before you click Confirm:
Invited clients are also able to mark tasks complete via the same steps within their Client Portal. However, clients can only complete tasks that are assigned to them. They will be unable to complete tasks that are assigned to an advisor or assistant. As the advisor, you can complete any task, regardless of the assignee.
Important Note on Planning Access

After inviting the client, be sure to give them access to the Tasks tab within their Planning Access checklist so that they can see and interact with their tasks!

Delete Tasks

To delete a task, check the box to left of the task, and then click the Delete button that appears at the top of the page. You can delete multiple tasks at a time by checking multiple boxes. Tasks that are deleted will not appear as "Completed" tasks after being removed.

Edit Existing Tasks

If you need to make adjustments to an existing task, you can always click on the task itself to re-open the data entry drawer on the right side of your screen. This can be useful if you need to make updates to the due date, task description, or any other input after having already created the task:

Assign Tasks to Multiple Clients
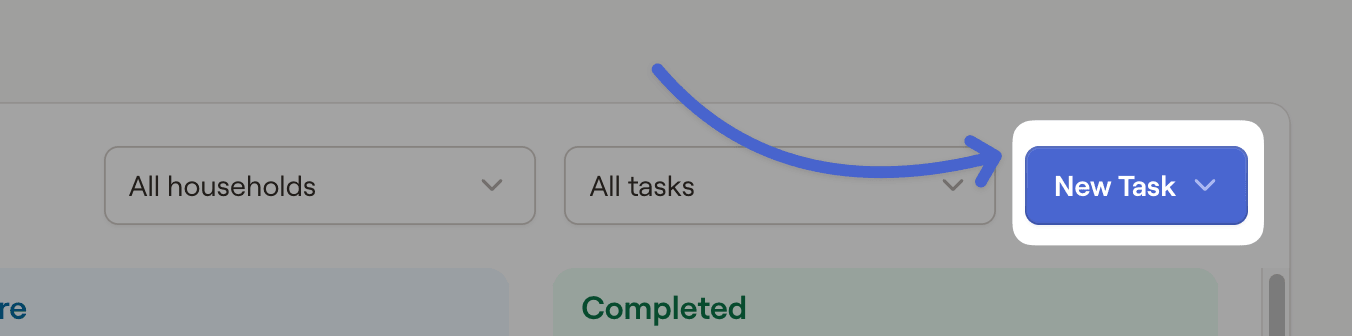
Because the consolidated tasks list encompasses your entire book of business, this area enables you to assign tasks and task templates to multiple clients or client groups at once. This will save you a significant amount of time in instances where several clients need to complete the same set of tasks.

The functionality to add new tasks within this area is identical to that of the client-specific Tasks tab:

Add a New Task

To create a new task, click the Add Task button in the upper right. You can then choose whether to create a single task, or assign a pre-made task template:

Single Task

When creating a single task, you will be asked for the description of the task in addition to other information like the due date, frequency, and priority. See below for a full overview of data entry inputs for new tasks.
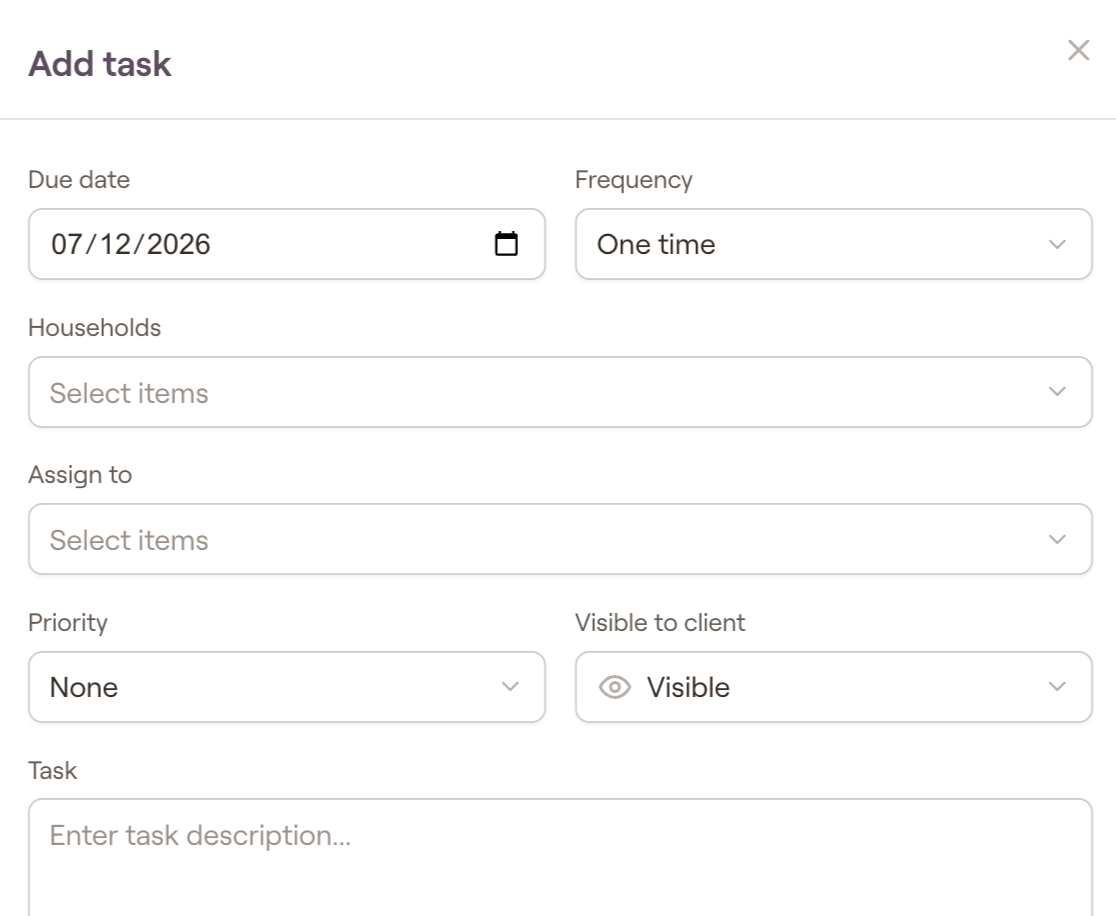
Entry

Description

Due date

Select the date on which the task will be due. You can type out a date manually, or click the calendar icon to the far right and choose a date from the calendar.

Frequency

Determine if you would like this task to occur on a One Time or recurring basis. Recurring options include Monthly, Quarterly, Semi Annual, and Annual. When a recurring task is completed, the next occurence will be automatically scheduled.

Clients

Choose the clients to whom this task will be assigned. You can select one or more individual clients, one or more client groups, or all clients.

Assign to

Choose one or more individuals to complete the task. Tasks can be assigned to the client/co-client, as well as advisors/assistants.

Priority

Assign the task a priority level. Click the exclamation point icon to toggle between priority levels. Options include High, Low, and None.

Visible to client

Decide whether the task will be visible on the client side. Click the eye icon to toggle between visible and not visible.

Task

Write the description for your task. Highlight a word within the text box to make a text format menu appear, allowing you add hyperlinks, numbered/bullet lists, and bold/italic text.

Task Template

When adding a task template, the details of each task will have already been entered within the template itself. Enter the initial due date, and then choose which clients the template will be assigned to. Once you're ready, click Save in the lower right to assign all tasks within the template at once.

Looking for more on Task Templates?

To learn more about utilizing Task Templates in RightCapital, please feel free to reference the article below:

Task Notifications

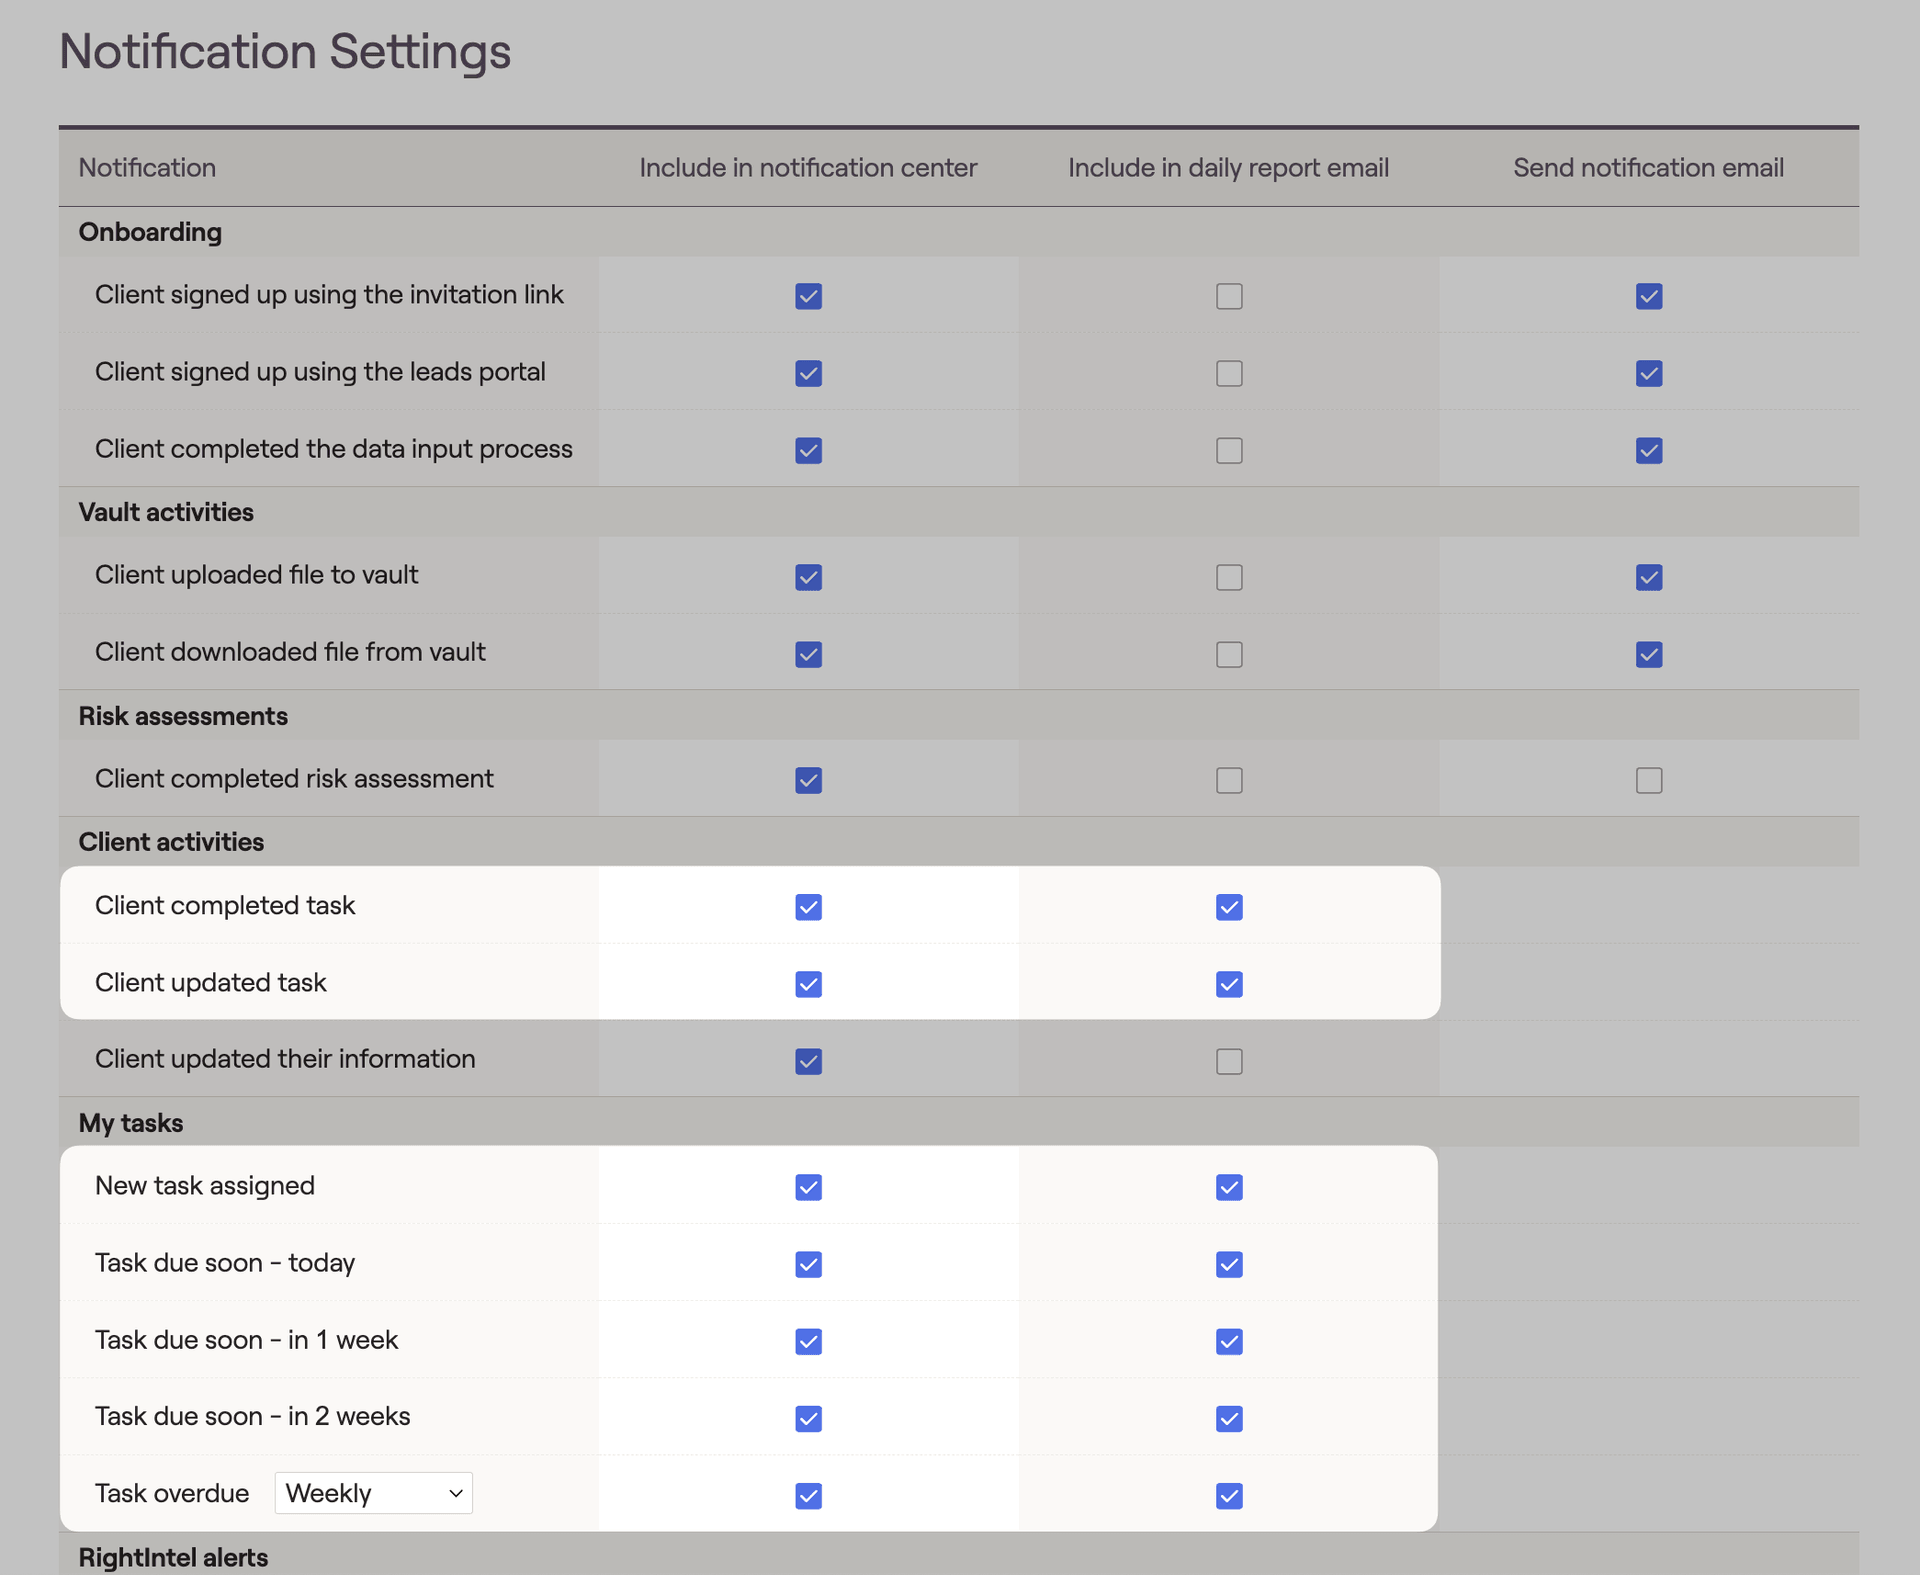
You and your clients can choose to receive task notifications via email. These reminders can be sent when new tasks are assigned, when tasks are due soon, and when tasks are overdue. As the advisor, you can also choose to receive notifications when clients complete and update tasks. See below for an overview of advisor and client task notification settings.

Advisor Notifications

There are several task-related notifications within the Notification Settings tab of the Notification Center. This area is where you can control the notifications you will receive as the advisor. The Notification Settings are accessible by clicking the Bell Icon in the upper right of your Advisor Portal:

You can choose to receive task notifications when clients complete and update tasks, when tasks are assigned to you, as well as when those tasks are upcoming and overdue. For each event, you can choose whether to receive the notifications within RightCapital's Notification Center, within your Daily Report Email, or both. See the screenshot below for all task-related notifications that you can opt into as the advisor:

Client Notifications

Similarly, clients can control their own task notifications by logging into their Client Portal, and navigating to the Gear Icon > Notifications tab:
Please note that while you cannot change the notification settings on behalf of an existing client, you can determine the default notification settings for all new clients within the Client Settings > Notifications tab of your Advisor Portal.
Looking for more on Notifications?

To read more about the advisor notification center and client notification settings, please feel free to reference the articles below:

Additional Information

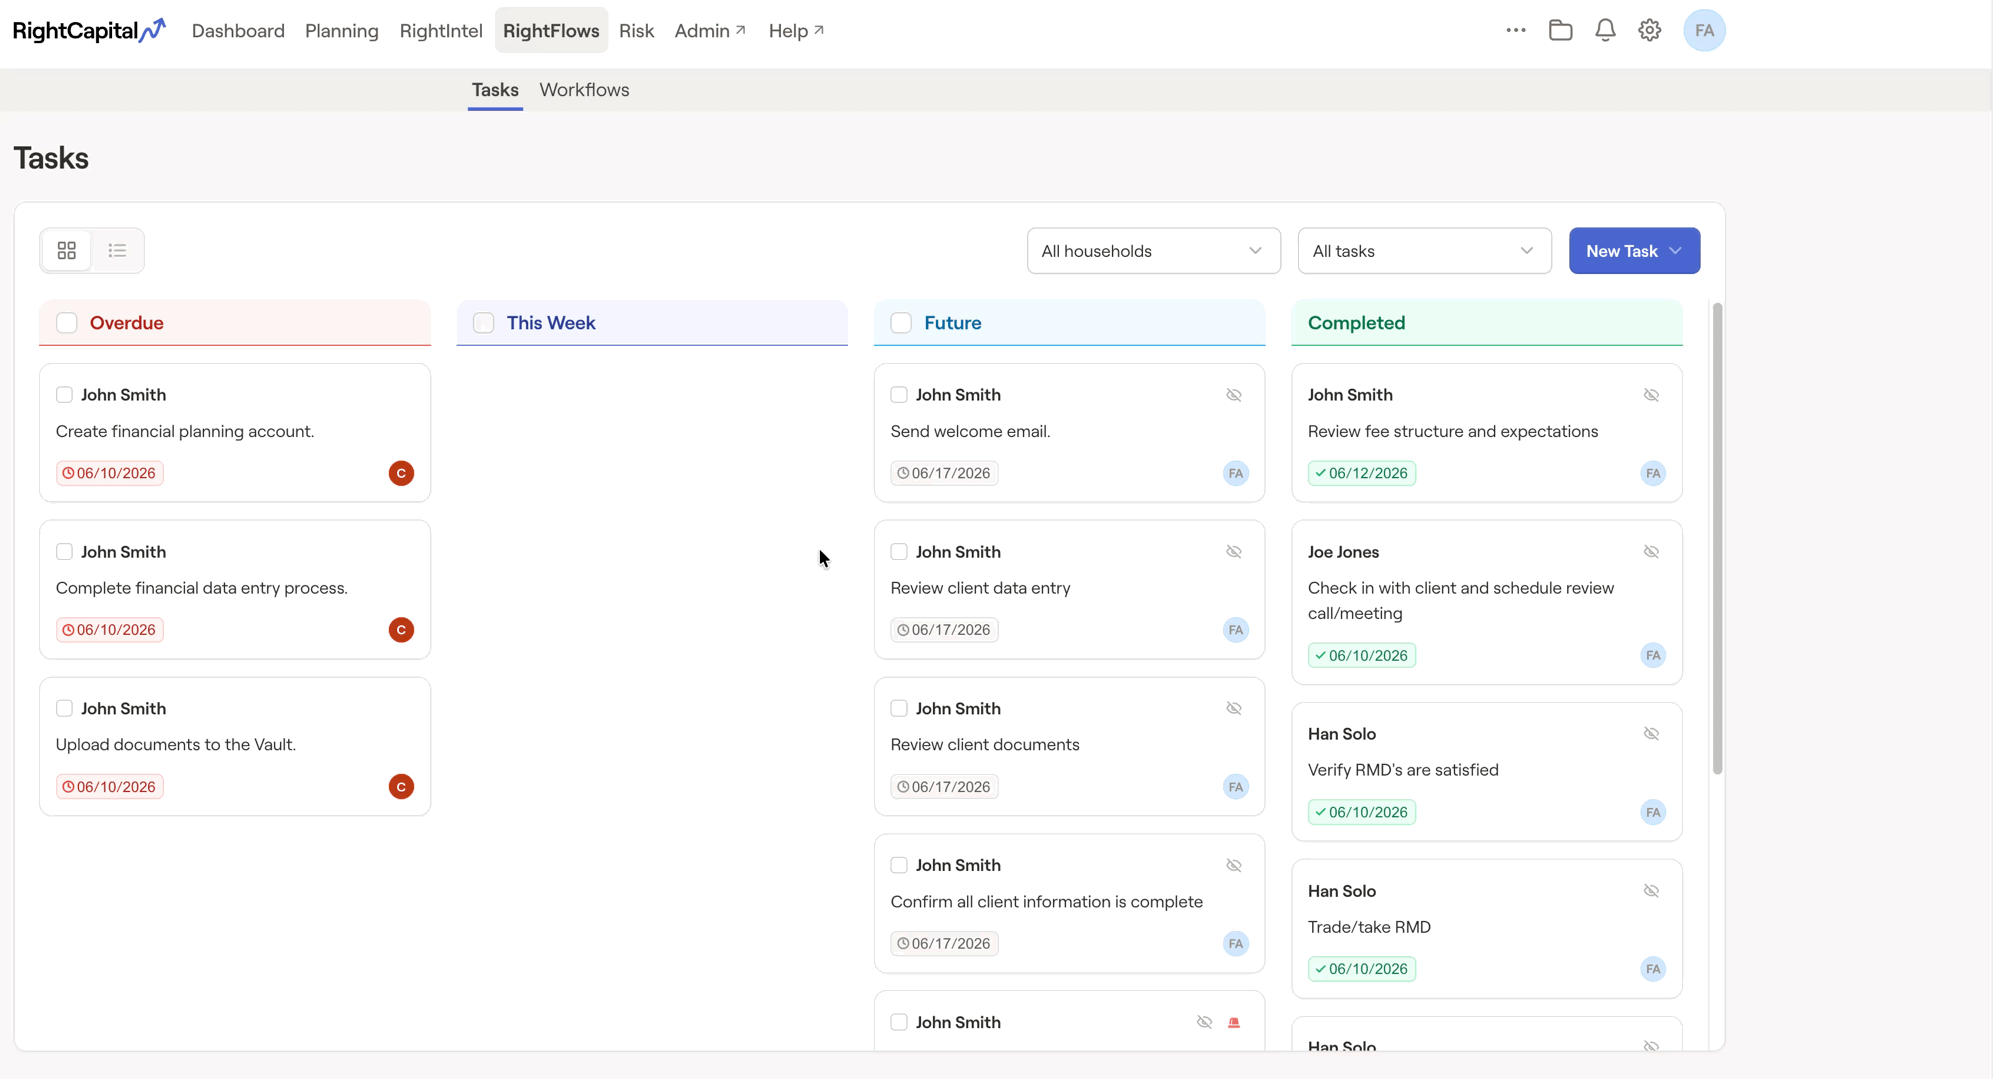
"Table View" and "Board View"

You can toggle between the new Board view, and the original Table view, using the icon to the right of the Tasks header:

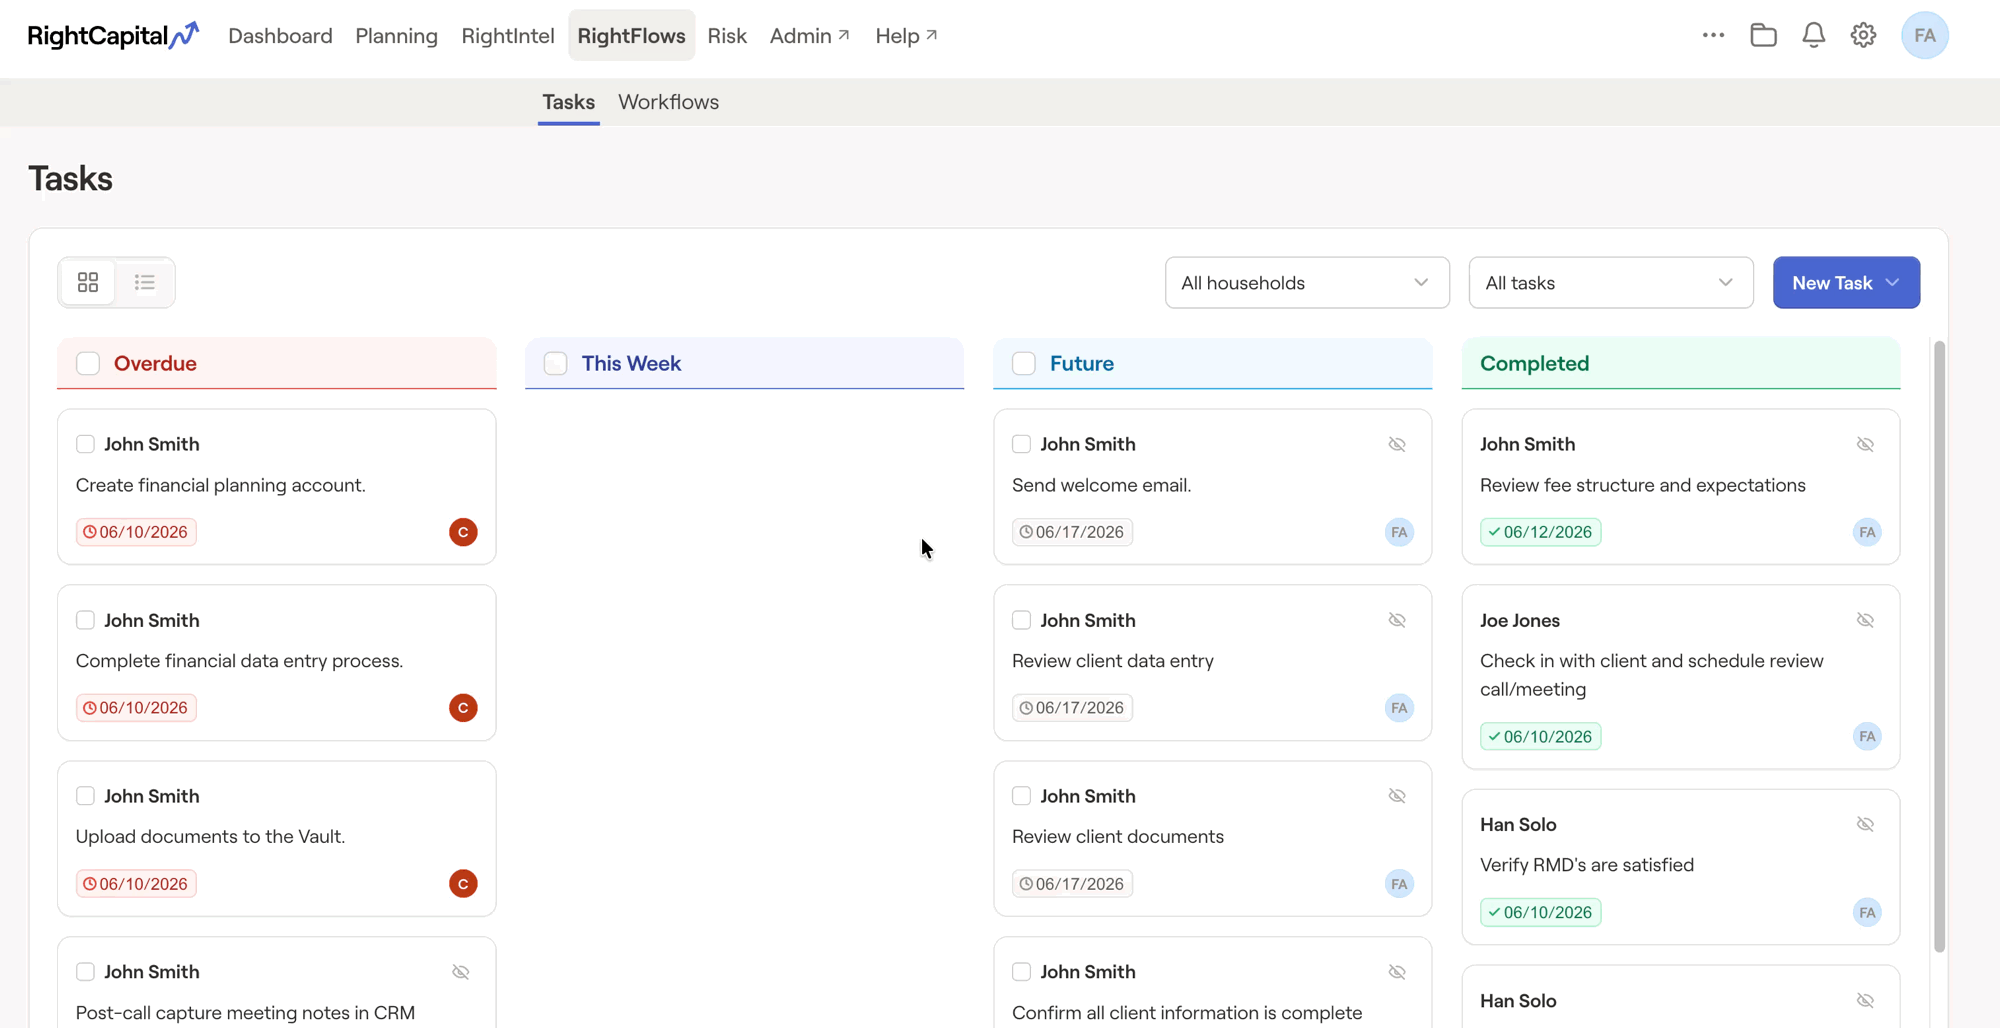
The Board view visually organizes overdue tasks, tasks due this week, future tasks, and completed tasks from left to right all on one screen. The Table view displays tasks in order of due date from top to bottom, and separates current and completed tasks into their own lists.

You can toggle back and forth between the Table and Board views at any time, and your most recent selection will be saved for the next time you log in.

Which layout should I use?
Although it is mostly a visual preference, each layout does have its practical benefits. The board view allows you to see current and completed tasks at the same time, while the table view is able to display more tasks on screen than the board view. Feel free to toggle back and forth depending on your needs!

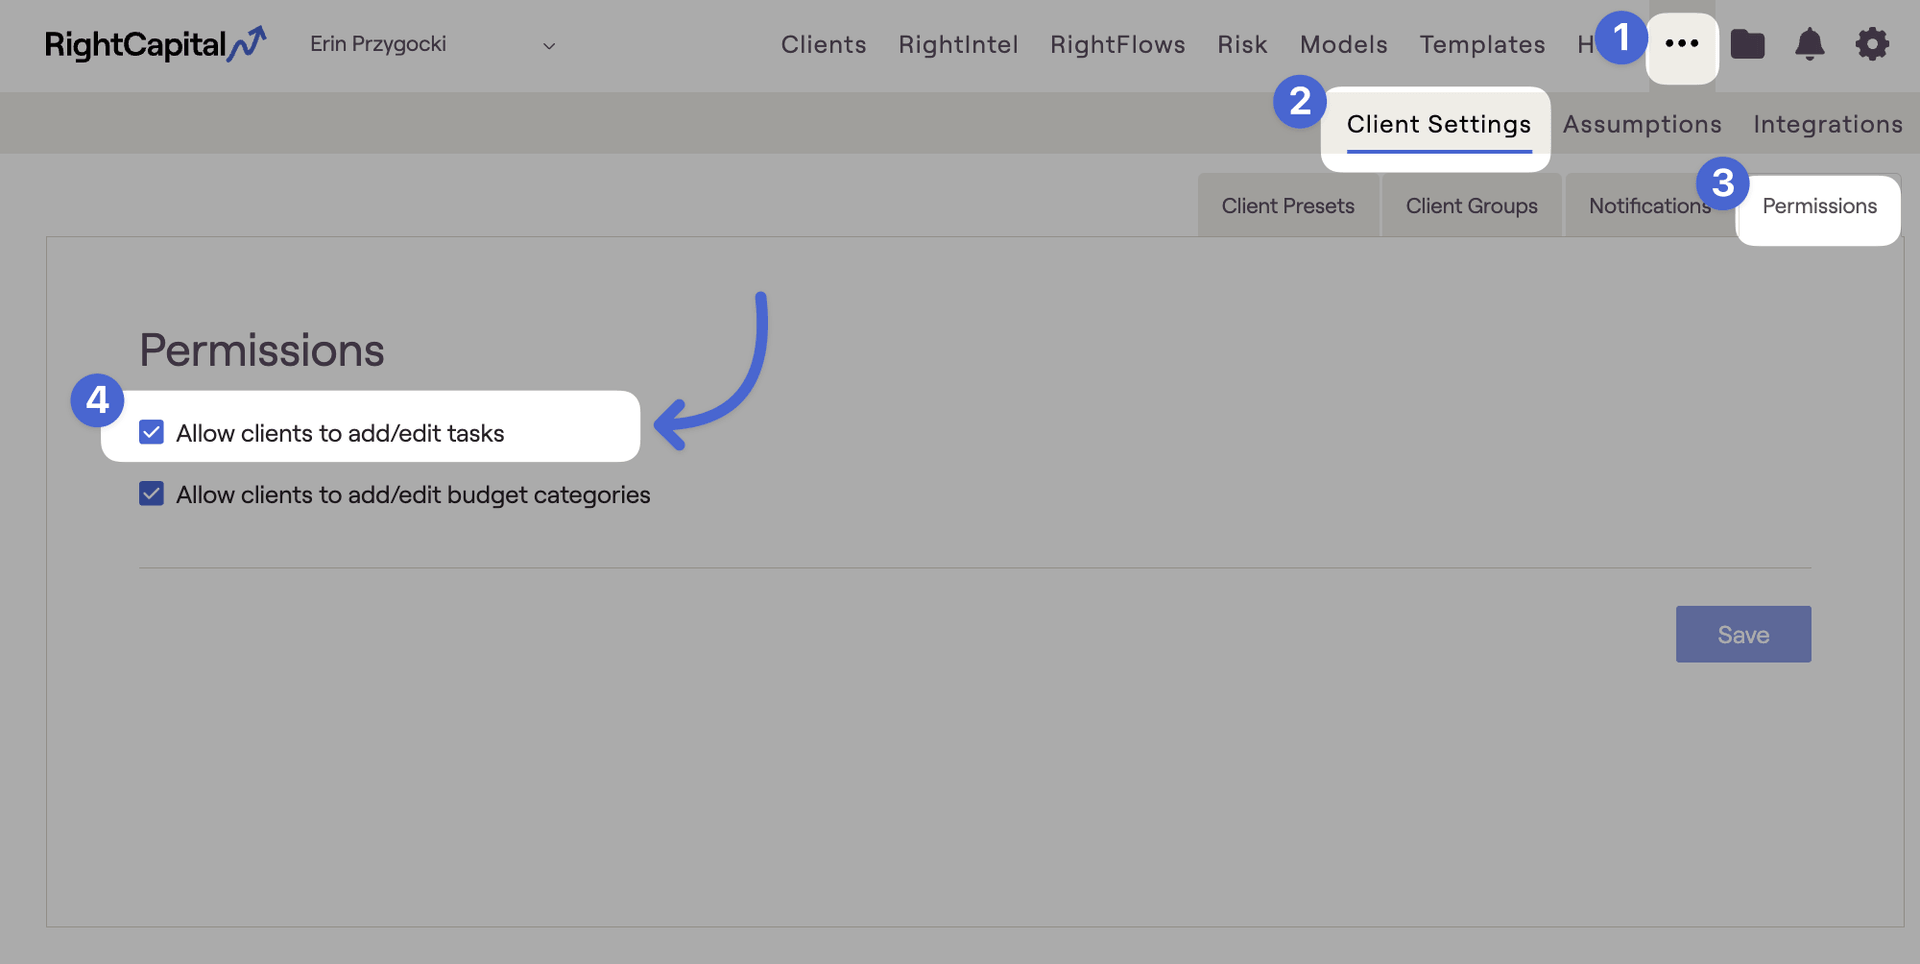
Allow clients to add/edit tasks

Advisors can grant clients access to add/edit tasks by visiting the Advisor Portal > Client Settings > Permissions tab. Your Client Settings tab may be located in the Advisor Portal > °°° More Menu, depending on your specific account setup.

Once there, check off the "Allow client to add/edit tasks" setting. This is a global setting and will apply to all clients. Clients can only edit tasks they have created, not tasks that advisors have entered.

Please note that this setting is checked by default. Unchecking this setting will prevent clients from adding tasks of their own. They will still be able to mark tasks complete that are assigned to them.
Contact Us

For additional assistance within RightCapital please contact our Support team.

Educational Webinars

RightCapital is committed to enabling your success. Each week, we cover essential planning modules and product updates.

RightCapital in Action

Check out our YouTube channel where we highlight Advisor Success Stories and share more Tips & Tricks!