Onboarding Templates

Within the Clients > Onboarding tab of the Advisor Portal, you can customize the onboarding process for clients who are still within their initial data entry phase. While this can be done individually for each client, you can also create Onboarding Templates. These templates allow you to save a particular onboarding layout, and quickly and easily apply that layout to one or more clients going forward.

Create an Onboarding Template

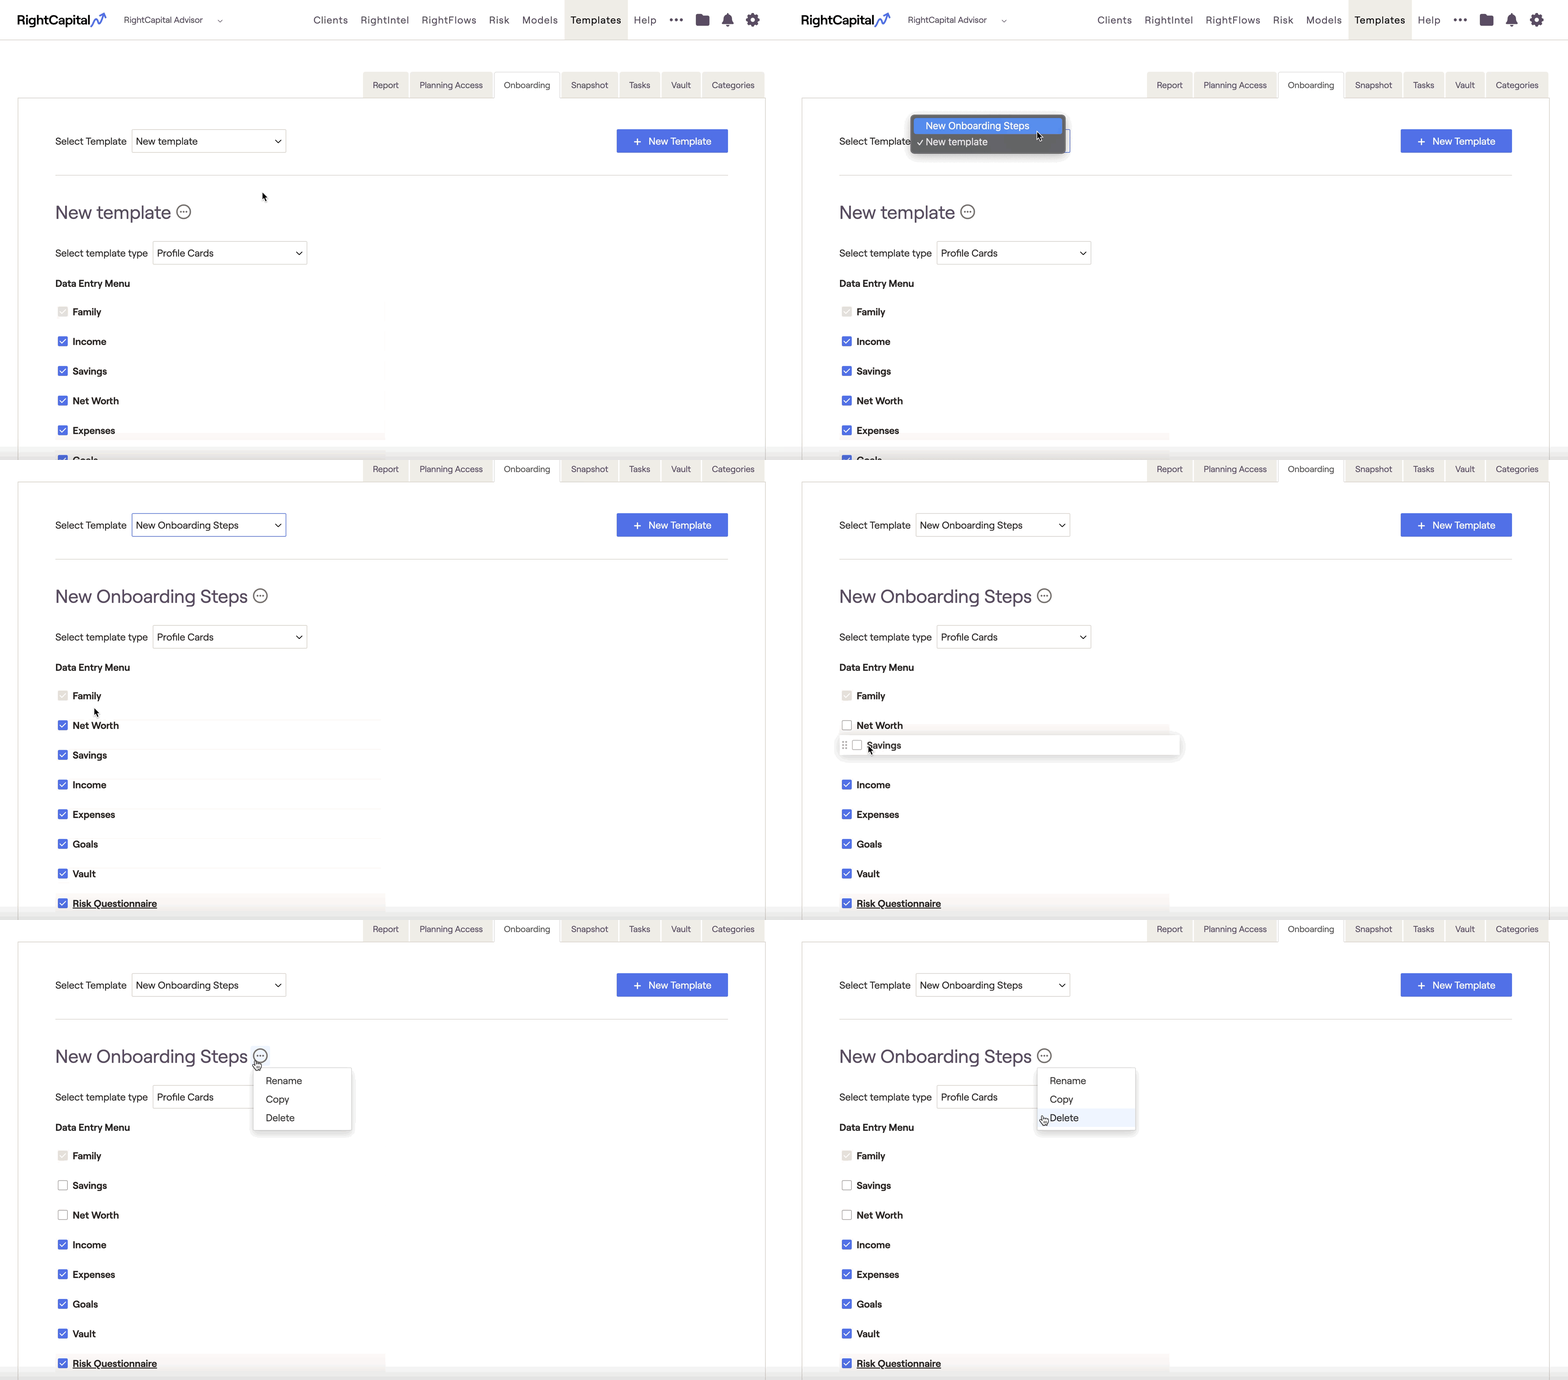
To create an onboarding template, navigate to the Advisor Portal > Templates > Onboarding tab. Your Templates tab may be located in the Advisor Portal > °°° More Menu, depending on your specific account setup.

Once here, click the blue 'Add Template' button to create a new, blank slate template.

  • Rename the template by clicking the "..." icon next to "New template"

  • Select the steps you would like to include by checking the boxes next to each step. Steps that are underlined can be clicked into for further customization.
  • Drag and drop each step into your preferred order. The only step that can't be removed or re-ordered is the Family Profile.
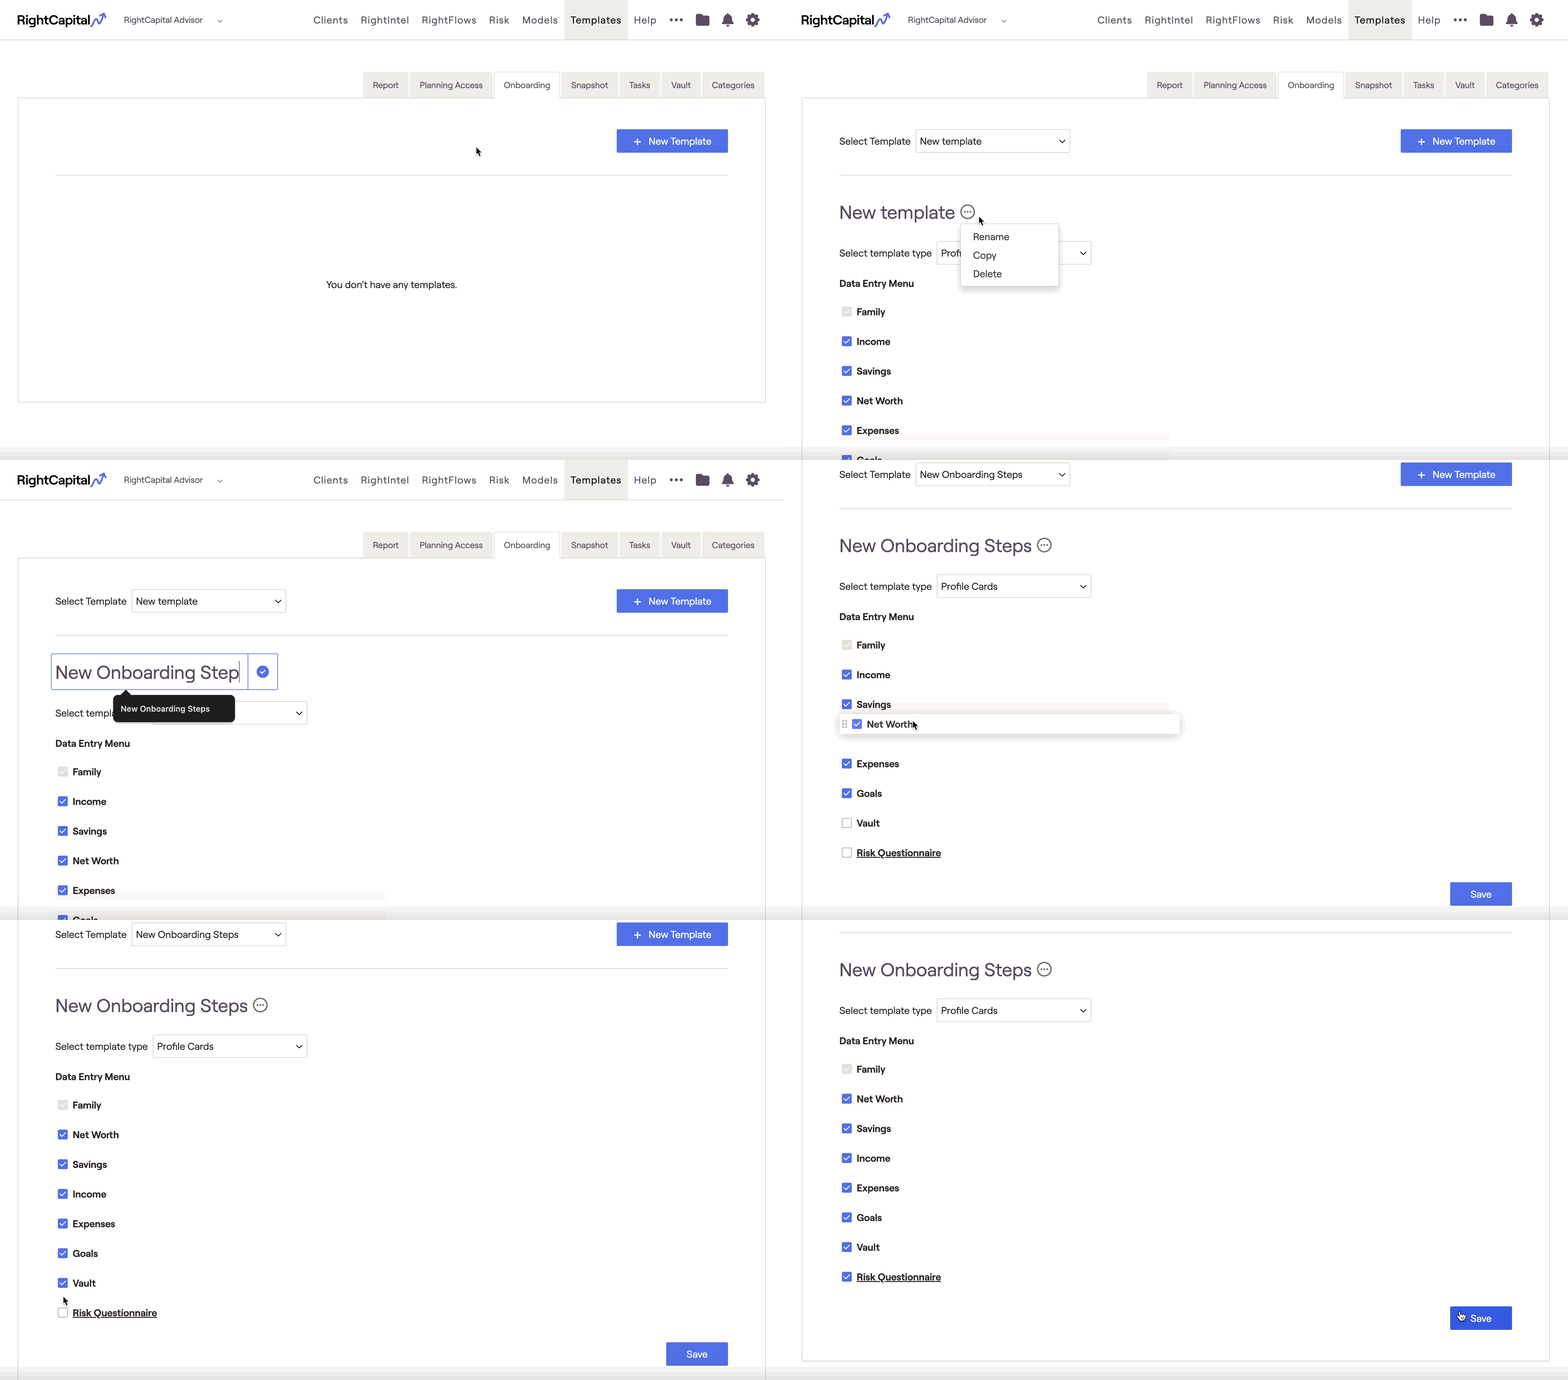
Once you have made your selections, click Save in the lower right.

Modify an Onboarding Template

After being saved, onboarding templates can be modified within the Advisor Portal > Templates > Onboarding tab. In this area, you will find a dropdown menu in the upper left to select specific templates and make any necessary modifications:
Templates can be renamed, copied, and deleted by clicking the '...' icon to the right of the template name. Be sure to click Save after making any changes.

Apply an Onboarding Template

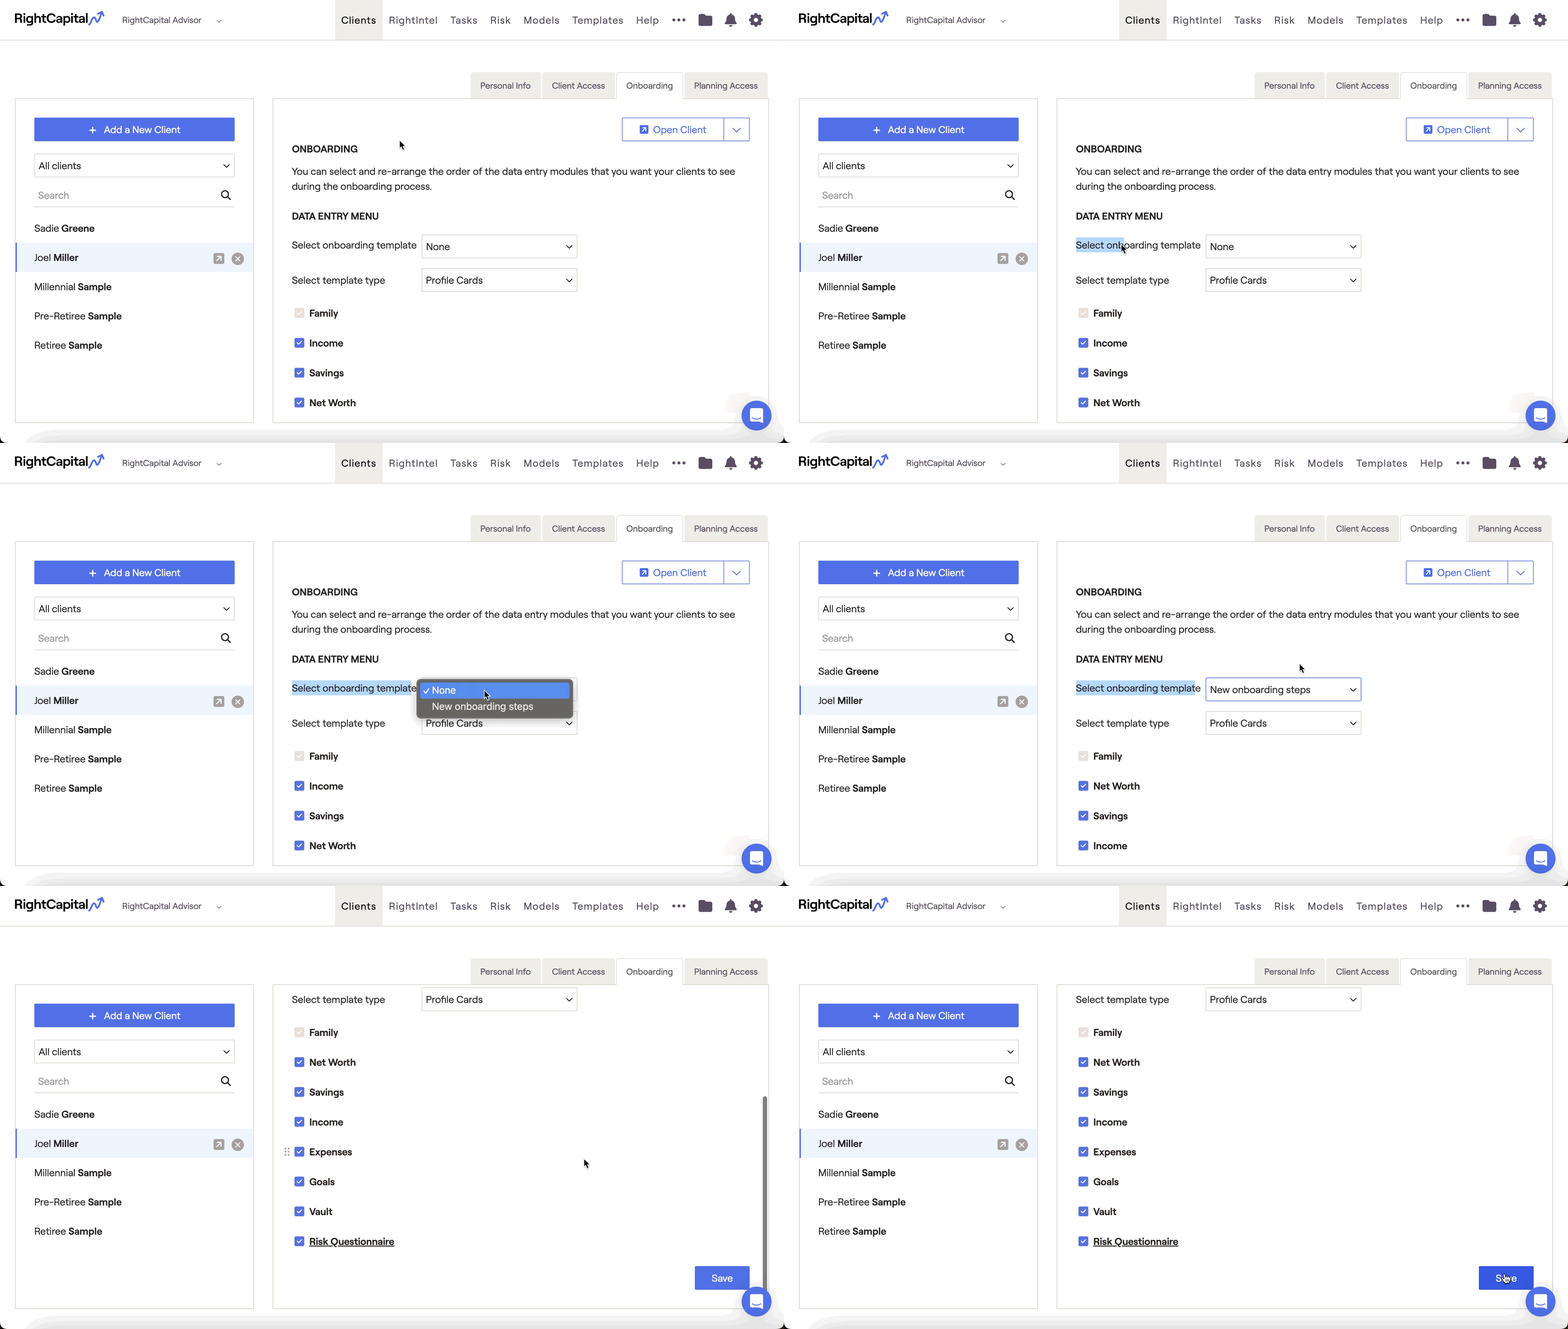
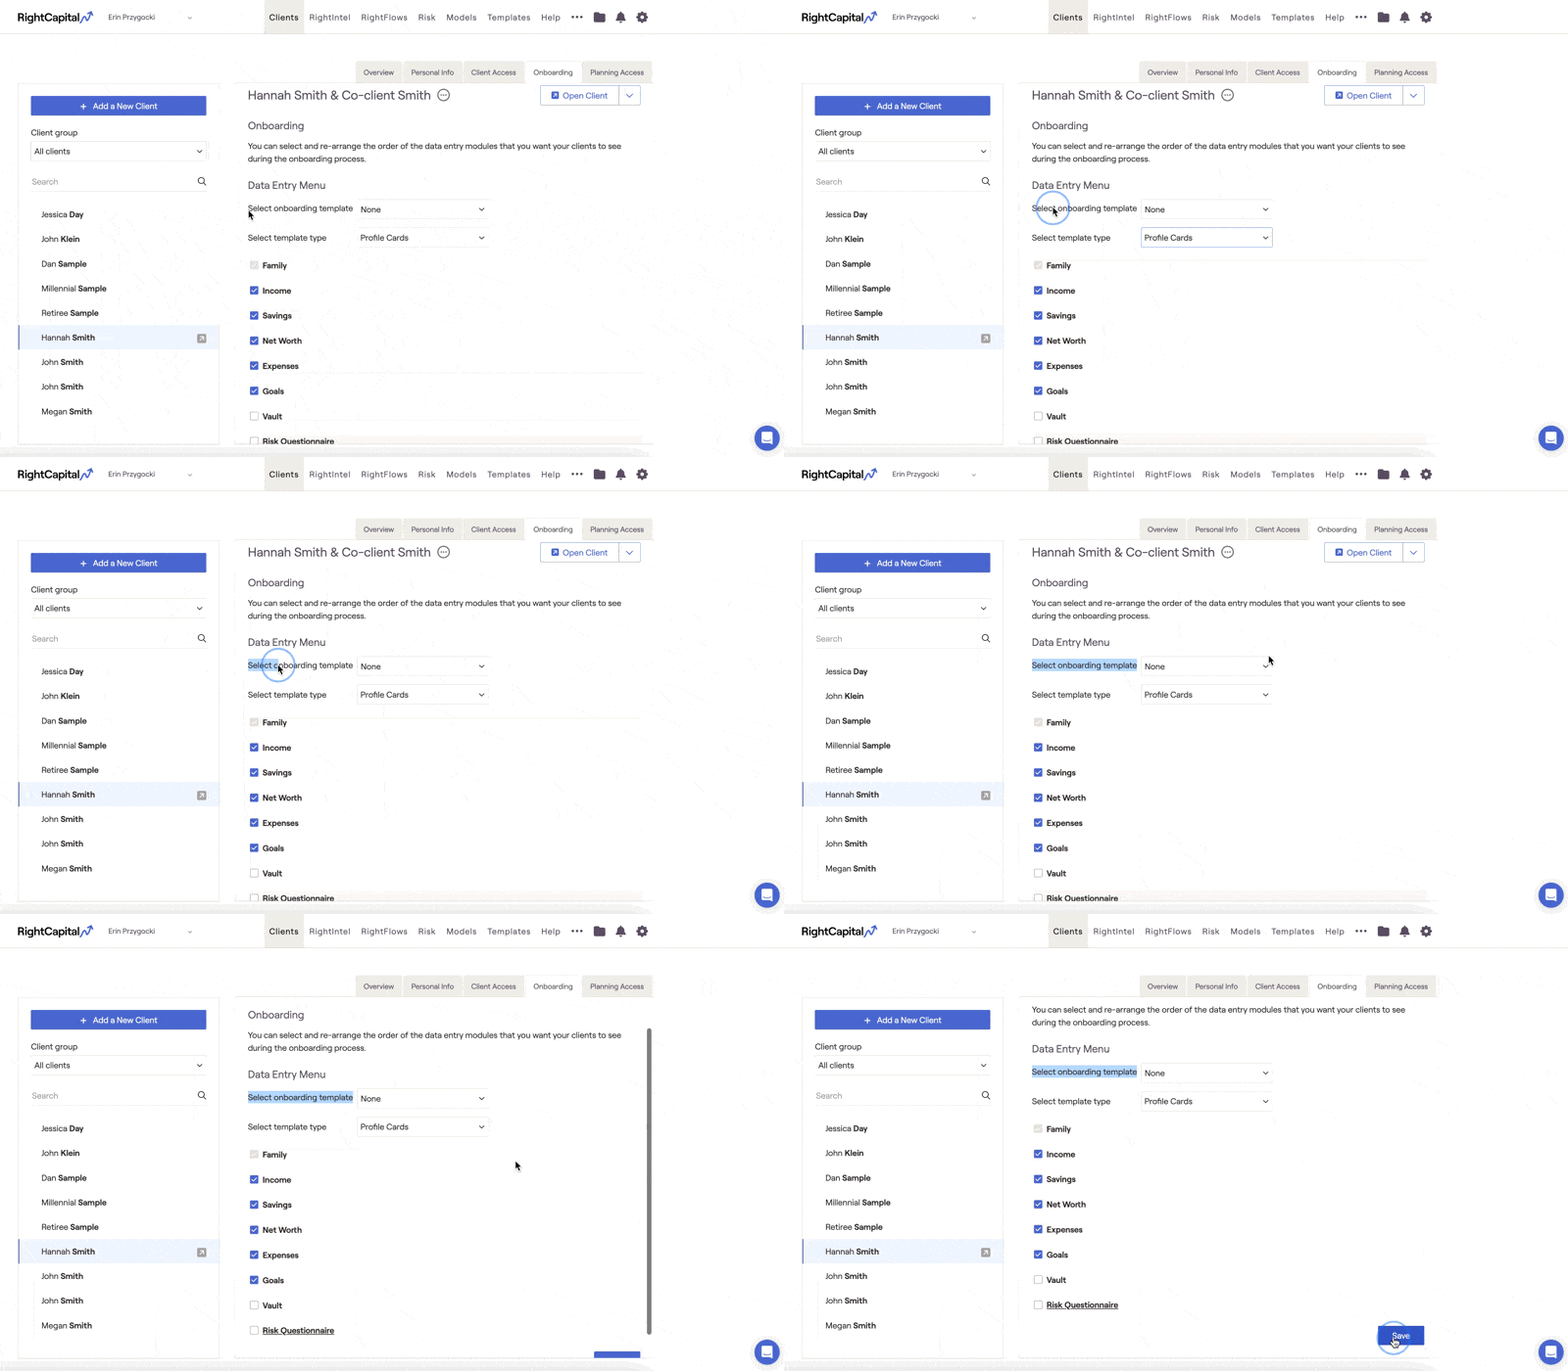
After being created and saved, onboarding templates can be applied within the Clients > Onboarding tab for a client. Use the 'Select onboarding template' dropdown to choose your desired template, and then click Save in the lower right:

Upon next opening the client plan, the initial data entry template will update to reflect your changes. Clients who have been invited to have access to their plan and are being onboarded virtually will also see these changes:
Change the Default Onboarding Template
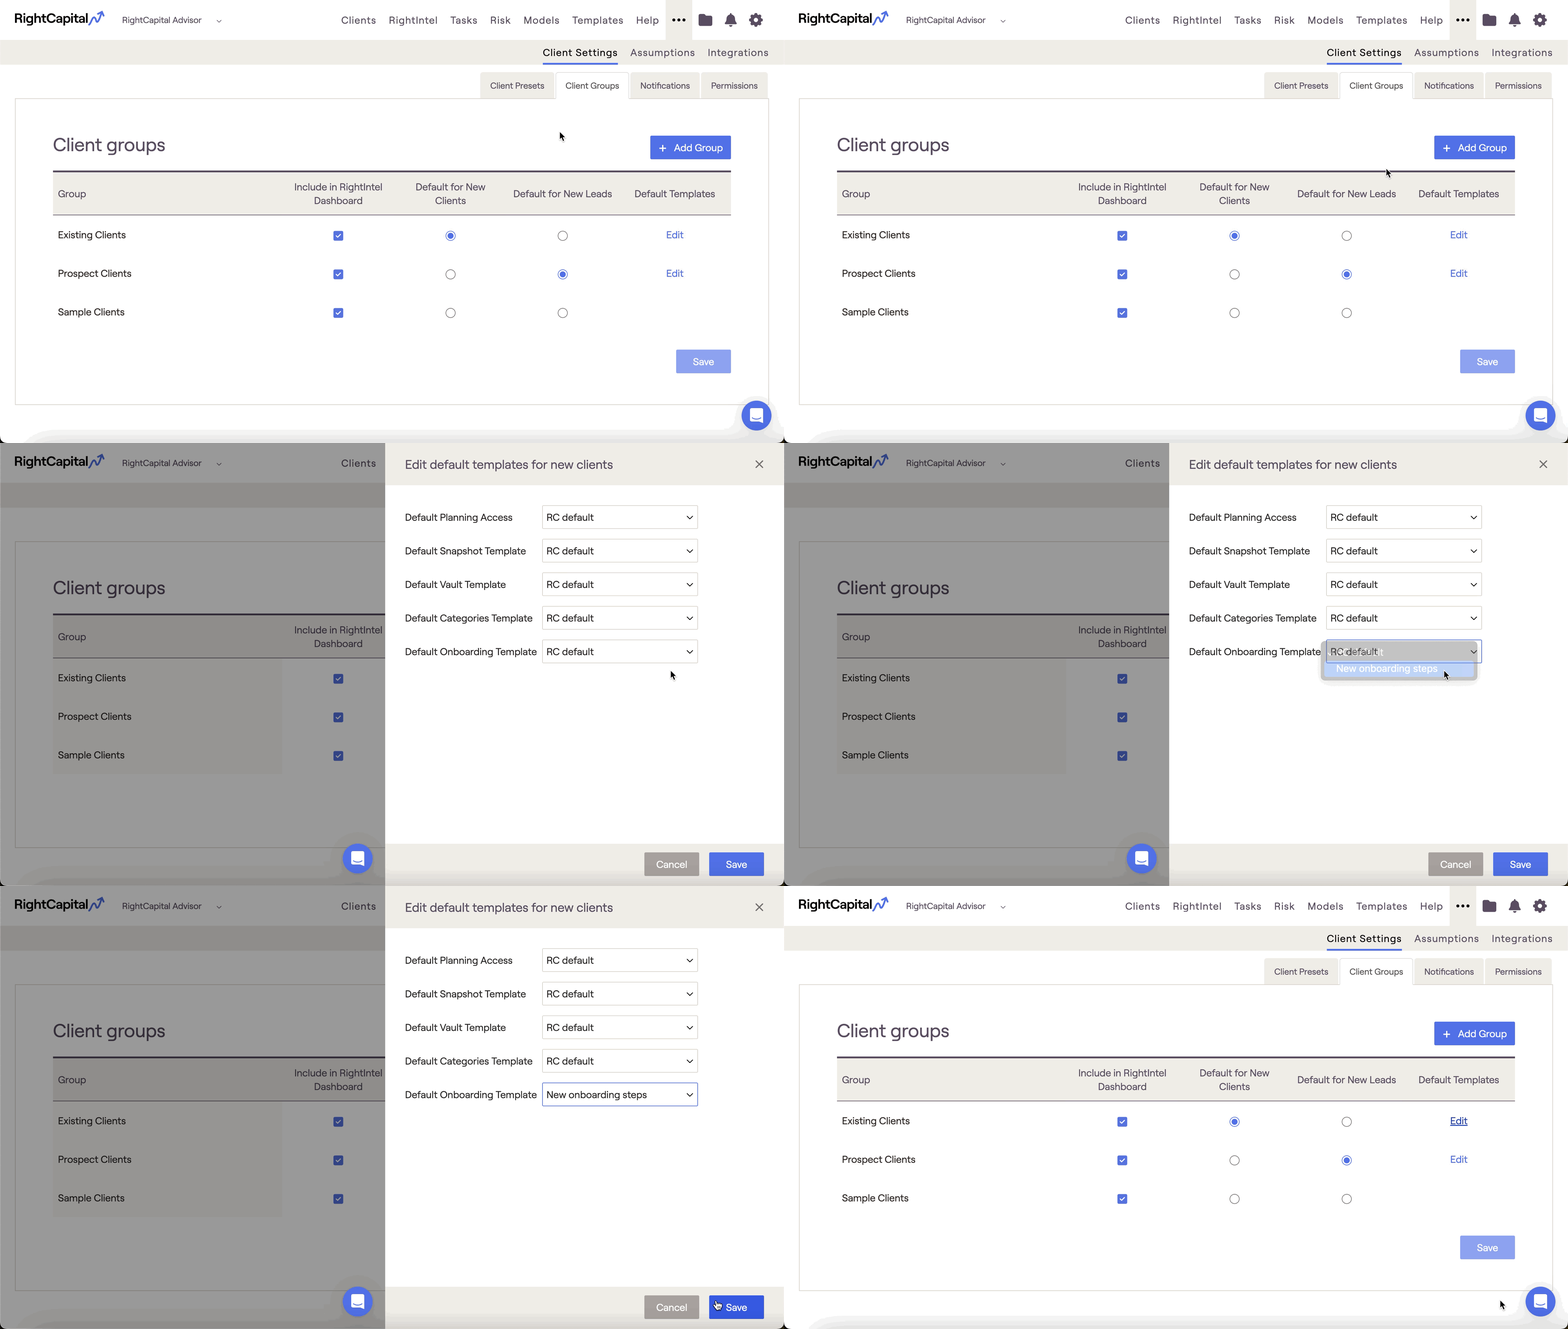
For your two client groups that are selected as the 'Default for New Clients' and 'Default for New Leads', you are able to adjust the default onboarding template for each group. This change will be applied to all new clients that are created within each group going forward.

To do this, navigate to the Advisor Portal > Client Settings > Client Groups tab. Your Client Settings tab may be located in the Advisor Portal > °°° More Menu, depending on your specific account setup:

Within this module, click the Edit button in the far right column to open a drawer on the right of your screen. Within this drawer, you can update the default Onboarding template for that client group, in addition to a number of other default templates.

Important Note on Default Templates
These selections will be applied for new clients created within each group going forward. Existing clients within each group will not be impacted.
Contact Us

For additional assistance within RightCapital please contact our Support team.

Educational Webinars

RightCapital is committed to enabling your success. Each week, we cover essential planning modules and product updates.

RightCapital in Action

Check out our YouTube channel where we highlight Advisor Success Stories and share more Tips & Tricks!