Within the Advisor Portal settings (represented by the "gear" icon), the Account tab contains several important pages that will impact your in-software branding, report cover pages, and more. These areas are Profile, Preferences, Customization, and Notifications. Reviewing each of these areas only takes a handful of minutes, and is an important step in setting up your RightCapital account:
The Profile tab is where you will input details such as your name, certifications, and firm info. This information will populate on the cover page of PDF reports that you generate for clients. Please reference the screenshot below to see where each piece of information will populate on the cover page of your PDF reports:
If you would prefer to omit some of this information, all of these fields are optional with the exception of the Firm Name. Leaving these fields blank within the Profile tab will cause them not to appear on your report cover page.
When making updates to your profile information, remember to click the Save button in the lower right corner of the page to save your changes!
You will also be able to add an additional report disclosure, if needed for compliance purposes. There is no character limit, and this field will automatically expand to fit additional text. Your custom disclosure will be included on the final page(s) of the report, after the 9-point disclosure that is included in every RightCapital report.
Checking the setting labeled "Do not automatically list my clients on Advisor Portal > Clients page" will hide your client list by default. Rather than displaying a full list of all of your clients within the Advisor Portal > Clients tab, checking this setting will instead create a searchable list that can pull up households without exposing additional client details from your book of business.
For a quick video tutorial that shows the impact of this setting, click here.
Checking the setting labeled "BCC me on all client communications" will automatically BCC (blind carbon copy) you on all client communications sent from RightCapital on your behalf. This includes client invitation emails, task reminders, and emails concerning RightPay subscriptions.
Checking the setting labeled "Default new tasks to 'not visible' to the client" will change the default visibility for new Tasks, causing them to be set to 'not visible' as a starting point rather than 'visible'. This setting is unchecked by default.
Checking the setting labeled "Default new notes to 'not shared' with the client" will change the default visibility for new Notes, causing them to be set to 'not shared' as a starting point rather than 'shared'. This setting is unchecked by default.
Checking the setting labeled "Create a College goal when a Child is added" will automatically create a College goal card in the Profile > Goals area when a child is added within the Family Profile. This setting is checked by default.
Checking the setting labeled "Mark managed accounts for the balance sheet details" will add a visual indicator to invested assets in the Balance Sheet that are marked as "managed". This setting is unchecked by default.
Checking the setting labeled 'Enable Iris AI features' will allow use of the Iris AI Assistant within the client portal. This setting is checked by default.
The Customization tab is your opportunity to update the logo, color scheme, and invitation email templates in RightCapital to align with your firm's unique identity. This can go a long way in creating a consistent, branded experience for your clients, in software, in emails, as well as in their PDF reports.
You can upload your firm's logo by hovering your mouse over the "Positive Logo" tile on the left, and clicking the Upload button. This will open a new window in the center of your screen, where you can either...
Drag and drop your logo file into the window
Choose the file from your computer's hard drive
Select a file from one of several file storage services
Once uploaded, your firm's logowill replace the RightCapital logo in the upper left corner of the software. It will also replace the RightCapital logo on the cover page of all PDF reports that you generate going forward.
Positive Logo vs. Negative Logo
If you are using white (or a very light color) as the primary color within the Color Theme area, the Positive Logo will be used everywhere that a logo appears. This includes:
PDF report cover page
Upper left corner of the software
Invitation and notification emails
Branded login page
Uploading a Negative Logo is only necessary if you choose to use a dark primary color. When using a dark primary color, RightCapital will automatically switch over to the negative logo everywhere expect for the PDF report cover page. Typically, the negative logo works best when it has a transparent background:
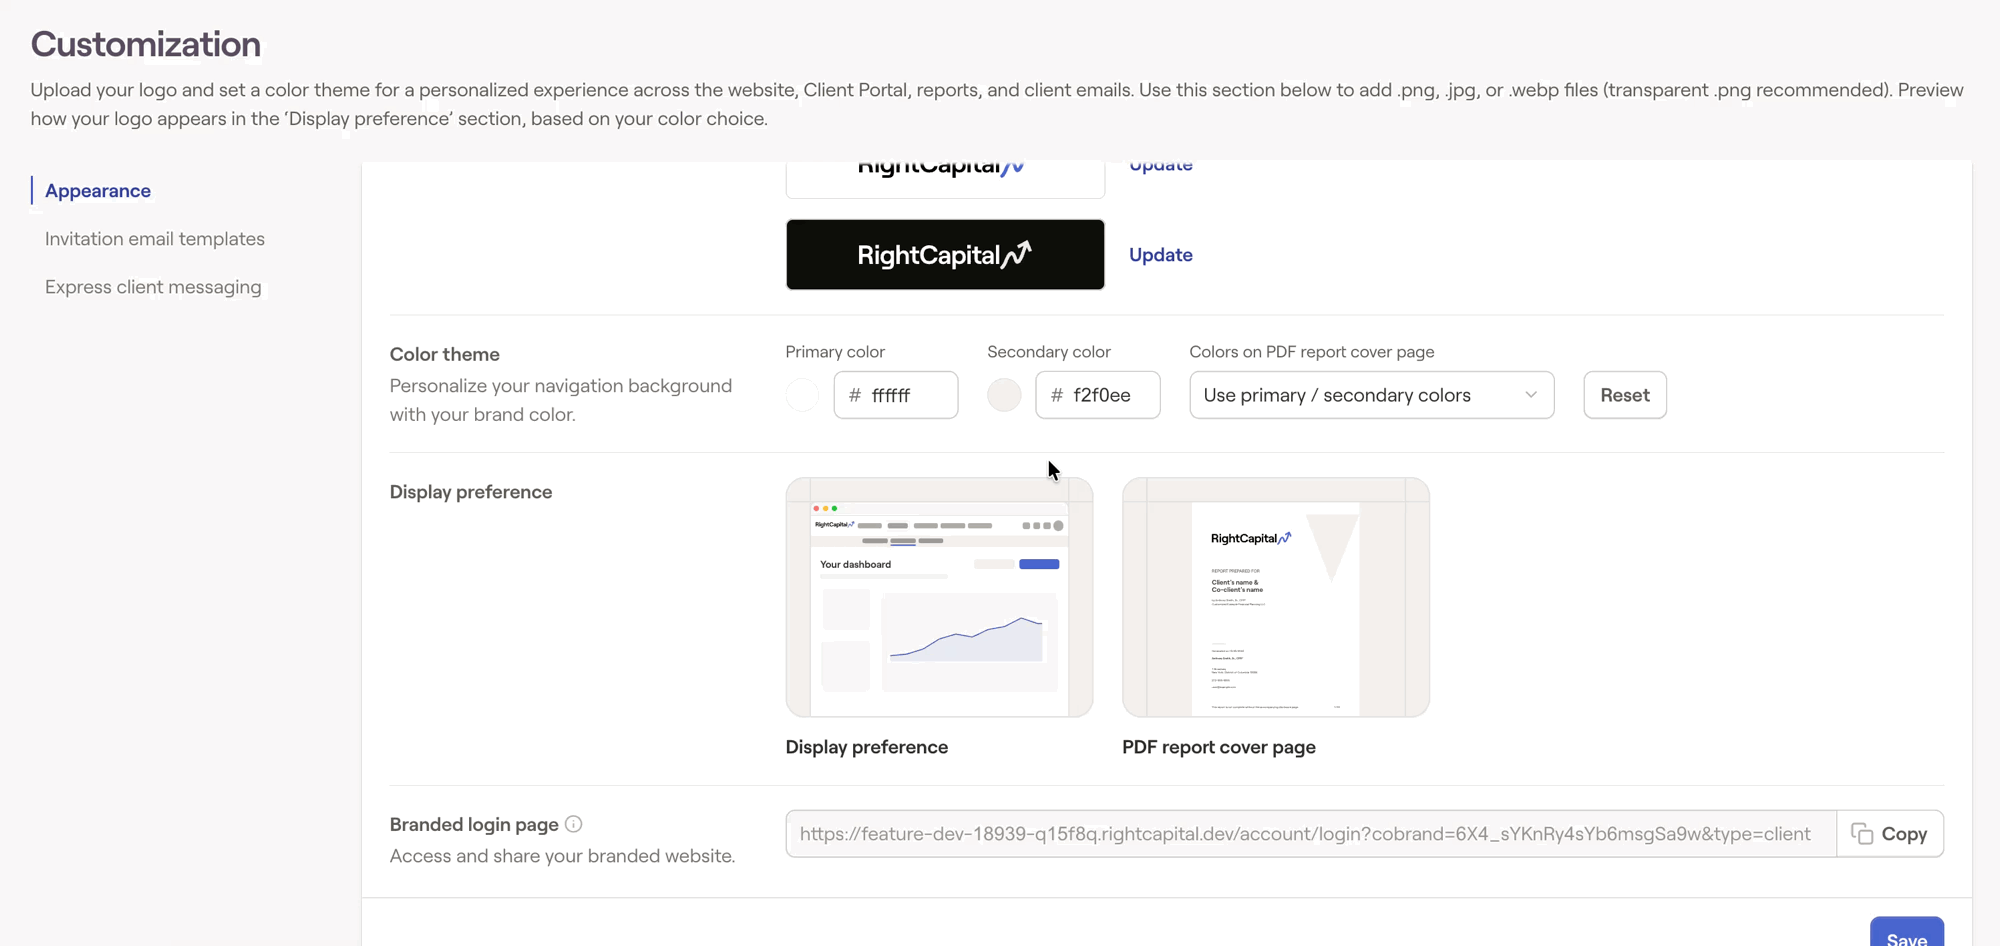
The Color Theme is an additional layer of customization that alters the colors displayed in the software, PDF reports, and emails. If you want your colors to better align with your firm's logo and unique branding, this can be a valuable tool.
The primary color corresponds with the software's upper menu bar, and the secondary color corresponds with the lower menu bar. Click the circle to the left of the HEX code to select your preferred color from a color palette. You'll be able to see what your changes look like in the Display Preference, before clicking Save to lock in your changes:
If you know exactly what colors you want to use, you can:
Type or paste the HEX code for that color into the text box
Use the color dropper within the # palette to copy any color on your screen
The Branded Login Page URL, found between the logos and the color theme, will take you to a RightCapital login screen that uses your custom logo and color theme. If you plan to invite clients to access their RightCapital plans, you can embed this link on your website or send it to clients after they have created their account. This will ensure that they see your custom branding on the login page, rather than RightCapital's branding:
Near the bottom of the Customization tab, you'll find the Invitation email template area. This is where you can make changes to the email invitation that will be sent to clients when you invite them to access their financial plans:
The first template, labeled "Email sent to clients where the data entry template is complete" is what will be sent to clients who are invited after completing the initial data entry process.
The second template, labeled "Email sent to clients who can still access the data entry template", is what will be sent to clients who are invited while the initial data entry process is still in progress.
You can update the content of each email template, as well as the subject, title, and button caption. After clicking Save in the lower right, these changes will be reflected in all email invitations that are sent going forward:
At the bottom of the page, you will find the Express client messaging section. Here, you can adjust the welcome message shown to new users of RightExpress.
The Notifications tab provides you with more control over the notifications you receive from RightCapital. For certain notifications, you can choose to 'Include as Activity in Dashboard'. For several notifications, you can choose to 'Include in notification center' (the Bell Icon > Notifications tab) and/or 'Include in daily report email.' For select notifications, you can choose to receive dedicated e-mail notifications by checking 'Send notification email':
The daily report email is sent starting at 11:00 am EST each day. This email is sent from no-reply@rightcapital.com, and will include all notifications that you have opted to 'Include in daily report email':
For advisors with Team Sharing enabled, each advisor will receive their own daily report email with notifications for their respective clients. Advisors will not receive notifications pertaining to clients listed under other advisors.
Checking the 'Send notification email' box for select notifications will send a direct notification to your inbox. Like the daily report email, these emails are sent from no-reply@rightcapital.com. Direct emails for Onboarding notifications are sent immediately, while emails for Vault activities are sent within a 10-minute window.
Tasks notifications are received when tasks are created, completed, updated, initially assigned to you, when your tasks are due soon, and when your tasks are overdue. You can choose the frequency of notifications for both upcoming tasks (due today, in 1 week, and in 2 weeks) as well as overdue tasks (weekly or monthly):
Advisor vs. Client Task Notifications
These options control your advisor task notifications. To make the default selections for task notifications that your clients will receive, navigate to the Client Settings > Notifications tab.
Vault activities notifications are received when clients upload or download files to the shared folder of the Vault:
RightIntel alerts are available for Premium and Platinum subscribers. Key event notifications will notify you when clients reach:
Retirement age
Social Security filing age
Medicare filing age
Age 50 (catch-up contributions)
Age 59.5 (penalty-free withdrawals)
RMD age
Client actions notifications are received when clients sign up using invitation/lead links, complete/update Tasks, complete onboarding, complete risk assessments, and when clients update their information (Family, Income, Savings, Net Worth, Expenses, Goals):
Workflow notifications are received when workflows are created and completed, or when workflow steps are completed, activated, deleted, or scheduled, and when scheduled workflows are started.
Contact Us
For additional assistance within RightCapital please contact our Support team.
Educational Webinars
RightCapital is committed to enabling your success. Each week, we cover essential planning modules and product updates.
RightCapital in Action
Check out our YouTube channel where we highlight Advisor Success Stories and share more Tips & Tricks!