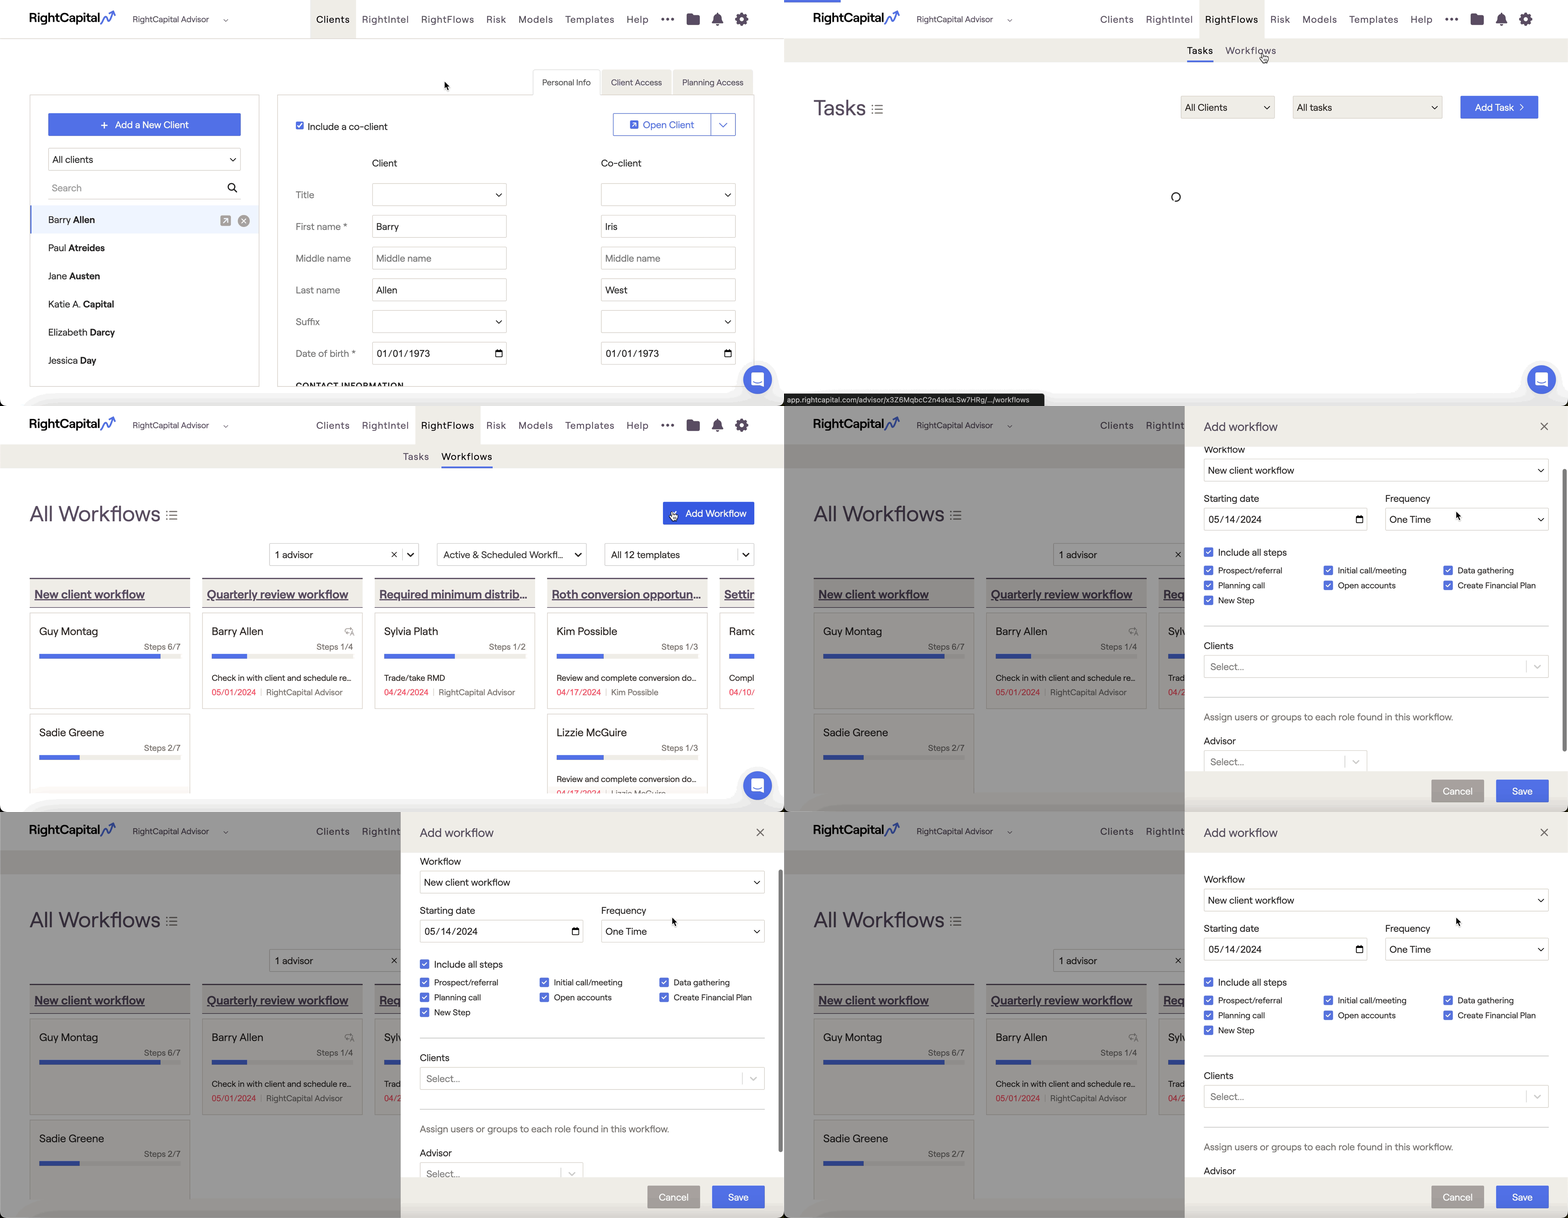
In the RightFlows > Workflows tab of the Advisor Portal, you can utilize workflows to assign tasks to clients and streamline your planning processes. To create a new workflow, click the Add Workflow button in the upper right. This will open a drawer on the right of your screen, allowing you to dial in the details of that workflow:

Workflow: Choose the workflow template that you would like to use as the foundation for this workflow.
Starting date: Select the date that you would like this workflow to start. Step 1 of the workflow will automatically become active on this date.
Frequency: Determine if you would like this workflow to occur on a One Time or recurring basis. Recurring options include Monthly, Quarterly, Semi Annual, and Annual.
When a recurring workflow is completed, the next iteration of that workflow will be automatically scheduled, based on the original workflow Starting Date. For example, a Semi Annual workflow with a Start Date of 01/01/2024, upon being completed, will be scheduled again with a new start date of 07/01/2024.
Include all steps: Decide to either include all steps in the workflow, or to include only select steps by unchecking the boxes for the steps you wish to omit.
Clients: Select one or more client households to apply this workflow to. Multiple households can be selected by individually clicking them from the dropdown.

Assign users or groups to each role found in this workflow: Select one or more people or groups for each role in the workflow. Roles within a workflow can include 'Advisor' and/or 'Assistant'. Individual tasks within a workflow that are assigned to either the 'Advisor' or 'Assistant' roles will be automatically assigned to the people or groups you select for each role. Multiple people or groups can be selected by individually clicking them from the dropdown.

Note For Super Administrators
The advisor/assistant roles are assigned to individual tasks within a workflow template at the firm level. RightFlows groups are also created by super admins at the firm level.
Once the details of your workflow are dialed in, click Save in the lower right corner to finish creating that workflow.