From the very first moment you log in, you have the flexibility to personalize the RightCapital experience to your individual specifications. In this article, we'll walk you through three easy steps to finish setting up your RightCapital account, so that you can hit the ground running!
After logging into your Advisor Portal, click into the Gear Icon in the upper right corner of the screen, and then choose the Account tab:
The Account tab contains several important pages that will impact your in-software branding, report cover pages, and more. Reviewing each of these areas only takes a handful of minutes, and is an important step in setting up your RightCapital account. Let's jump in!
The Profile tab is where you will input details such as your name, certifications, and firm info. This information will populate on the cover page of PDF reports that you generate for clients. If you would prefer to omit some of this information, all of these fields are optional with the exception of the First and Last name. Leaving these fields blank within the Profile tab will cause them not to appear on your report cover page.
At the bottom of the page, you will also be able to add an additional report disclosure (please note that this field is optional). There is no character limit, and this field will automatically expand to fit additional text as you type. If it's easier, you can also copy and paste into this field. Your custom disclosure will be included on the final page(s) of your reports, after the 9-point disclosure that is included in every RightCapital report. Be sure to click the Save button in the lower right of the page to save your changes before moving on to the next step.
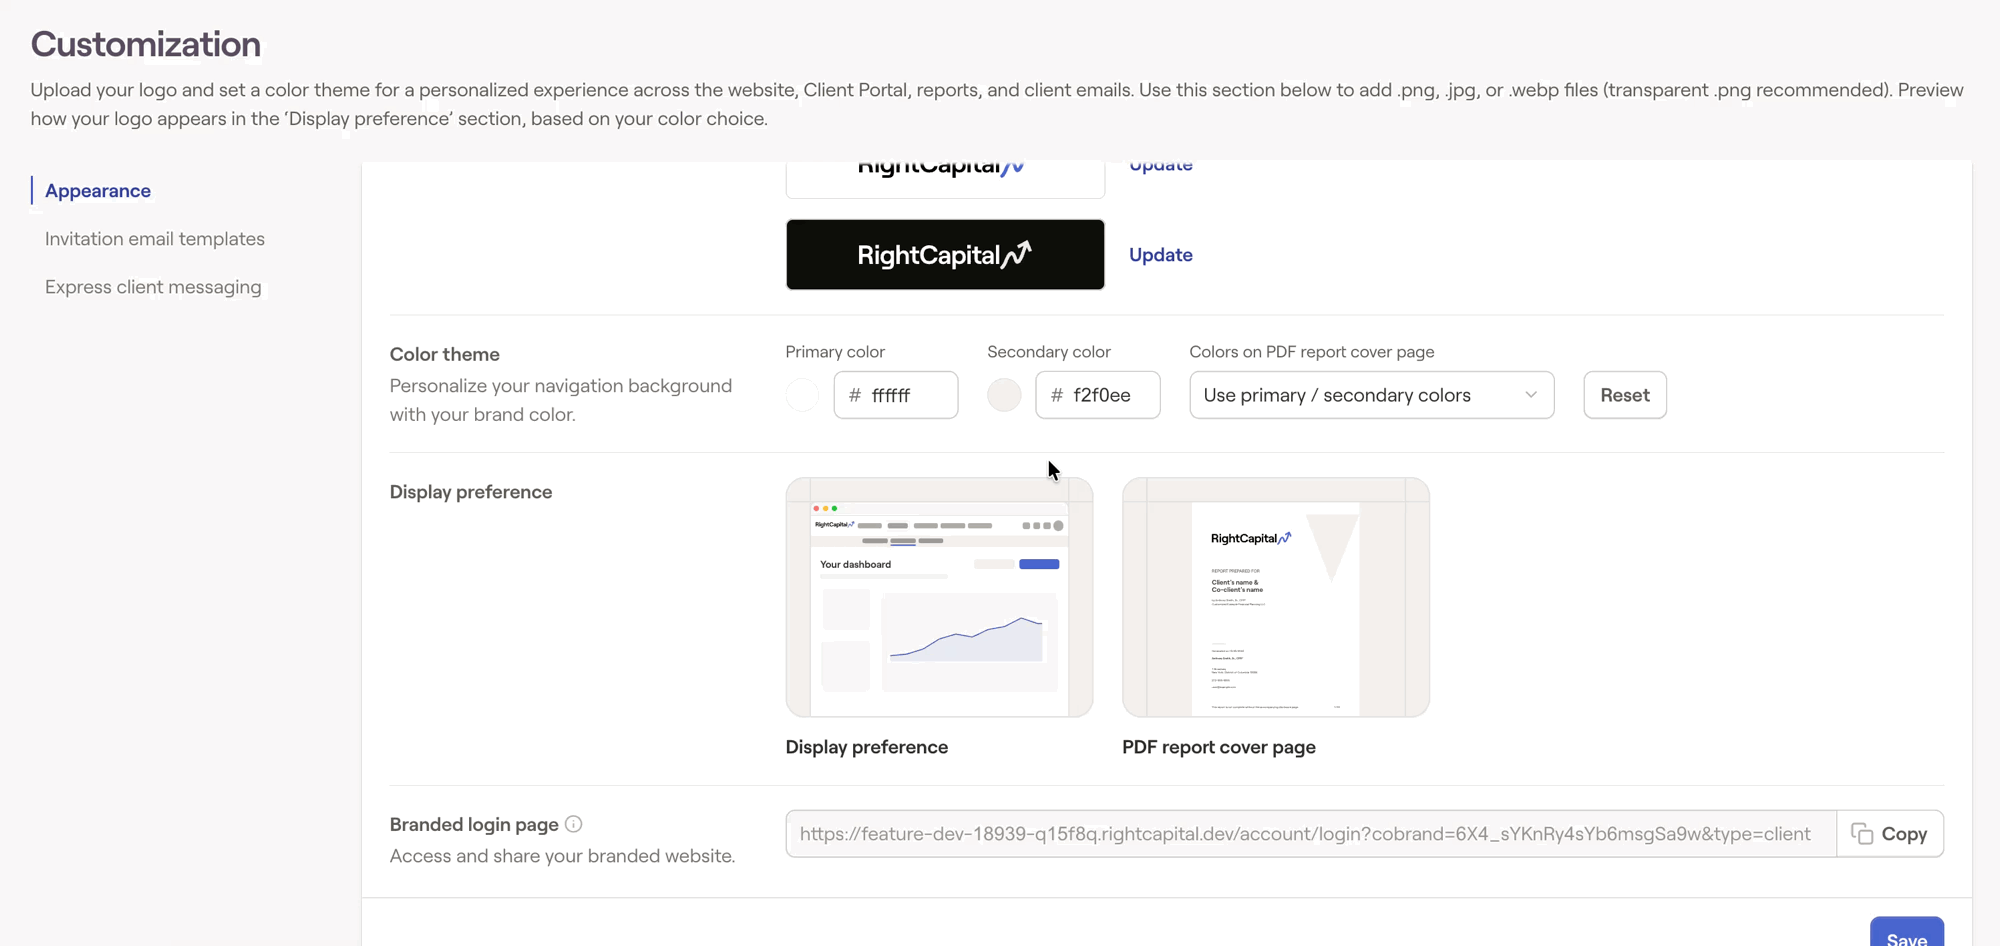
After filling out the Profile, our next stop is the Customization tab. This is your opportunity to update the logo and color scheme in RightCapital to align with your firm's unique identity. This can go a long way in creating a consistent, branded experience for your clients.
Uploading Your Logo
You can upload your firm's logo by selecting the "Update" option next to the positive or negative logo, This will open a new window in the center of your screen, where you can either...
Drag and drop your logo file into the window
Choose the file from your computer's hard drive
Select a file from one of several file storage services
Once uploaded, your firm's logowill replace the RightCapital logo in the upper left corner of the software. It will also replace the RightCapital logo on the cover page of all PDF reports that you generate going forward.
Update Your Color Theme
The Color Theme is an additional layer of customization that alters the colors displayed in the software. If you want your colors to better align with your firm's logo and unique branding, this can be a valuable tool.
The primary color corresponds with the software's upper menu bar, and the secondary color corresponds with the lower menu bar. Click the # to the left of the HEX code to select your preferred color from a color palette. You'll be able to see what your changes look like in the Client Preview, before clicking Save to lock in your changes. You can optionally choose to include a design with your custom colors on the cover page of your PDF reports, using the setting to the far right.
Those are the custom branding basics! If you're looking for more details, feel free to click on the dropdown arrows below to learn more...
Looking for more on Account Settings?
For more information on the sections of the Account Settings that aren't covered here (such as the Preferences tab, Branded Login page, and Invitation Email Templates), feel free to click the link below to read our dedicated article on Account Settings:
With your profile filled out and your custom branding in place, dialing in your asset return and inflation assumptions is an important next step. To do this, navigate to the Planning > Assumptions tab of the Advisor Portal:
This module is your opportunity to better align RightCapital's retirement projections with your unique advising style and philosophy. Your selections here will be used as the global assumptions across all of your client plans.
What are Global Assumptions?
Global assumptions in RightCapital are used as a starting point whenever you create a new client plan. Within each plan, you can choose to use either your global assumptions, or a set of customized, household-specific assumptions.
See below for an overview of asset return and inflation assumptions in RightCapital. Alternatively, feel free to watch our quick video overview on advisor assumptions:
The Asset Return tab is where you can review and update the asset return assumptions that will be used by RightCapital's Monte Carlo and Cash Flow projections. Each asset class allows you to specify the Interest, Dividend and Capital Gain percentages, the sum of which make up the Total Return. You can customize the percentages for each field, or choose to use an available preset:
Historical Index Returns
Assumptions based on 20 to 50 years of historical index return data. This is the default setting in RightCapital, and is updated on an annual basis.
Forward-Looking Assumptions
Assumptions derived from JP Morgan's Long-Term Capital Market Assumptions report. These figures are updated on an annual basis.
Customized Return Assumptions
Add a custom return assumption scenario by selecting "+ New Return Assumptions". Enter the interest/dividend and capital gain percentages for each asset class. This option provides the most flexibility, allowing you to manually customize your return percentages.
Looking for more on Asset Return Assumptions?
For more background and detail on the Historical and Forward-Looking assumption presets, please see our dedicated article on Asset Return Assumptions.
Asset return assumptions are a critical component of each and every financial plan, having an impact on tax calculations as well as future growth on invested assets. It is generally recommended to review and update your return assumptions periodically, to ensure robust projections and provide the most value to your clients.
The Inflation tab is where you can review and update the inflation assumptions that will be used across your client plans in RightCapital. Five different inflation rates are used to project corresponding goals and expenses out into the future. You can customize the percentages for each type of inflation independently:
Inflation Type
Description
General inflation:
Adjusts living expenses and general goals.
Health care cost inflation:
Adjusts health care and long-term care expenses/goals.
Education cost inflation:
Adjusts pre-college and college goals.
Social Security inflation:
Adjusts Social Security benefit amounts.
Tax inflation:
Adjusts tax bracket income thresholds, and contribution limits.
Looking for more on Inflation Assumptions?
For more details on the default inflation rates and the specific impact of each inflation type, check out our dedicated article on Inflation Assumptions.
After personalizing your account and fine-tuning your assumptions, the final step in setting up your account is establishing your integrations. This process allows you to connect other technology platforms that you already utilize in your practice, allowing for the reliable and secure transfer of data into RightCapital. Integrations help to streamline the data entry process with technology, so you can focus more time on advising your clients.
To begin this process, start by navigating to the °°° More Menu > Integrations tab of the Advisor Portal:
This page will provide you with a full list of all of our integration partners. You can find integrations by scrolling through the list on the left side of the page, or by using the search bar in the upper left corner. For each integration, you will find detailed instructions to walk you through the process of linking that platform to RightCapital.
Each integration also has a corresponding help center article. These articles can be found beneath the setup instructions for an integration, and will include additional details on how that integration can be used once it is set up:
Please remember that if you ever need help setting up an integration (or completing any other step listed in this article), you can always reach out to the RightCapital Support Team for assistance!
Next Step: Creating Plans & Data Entry
Congrats! You've completed the first step in our Getting Started Roadmap. To move on to the next step and start creating client plans in RightCapital, click the link below!